Scholar’s Mate: How to Prevent This and Earn Easy Wins
All amateurs are obsessed with the Queen’s power in the early stages of the game, and for good reason. Amateurs love a quick knockout- since the goal of the game is checkmate, wouldn’t it be nice to achieve this even faster? And sometimes this comes with great success, which is why beginners are obsessed with the Scholar’s Mate, an opening that aims for a quick checkmate.
Chances are, if you have played chess before, you have seen this opening played before. Most beginners lose games like this:
- e4
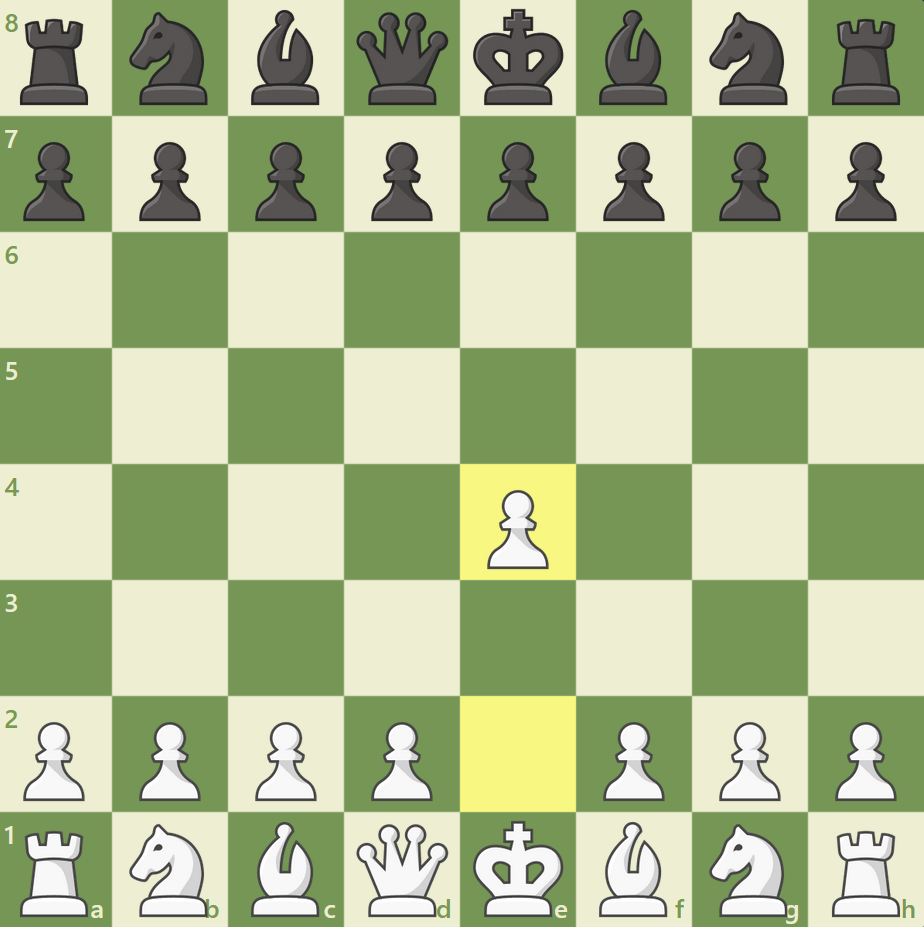
One of the best opening choices: controls the center, and opens up two pieces up: the bishop on f1 and the queen on h5.
- …e5
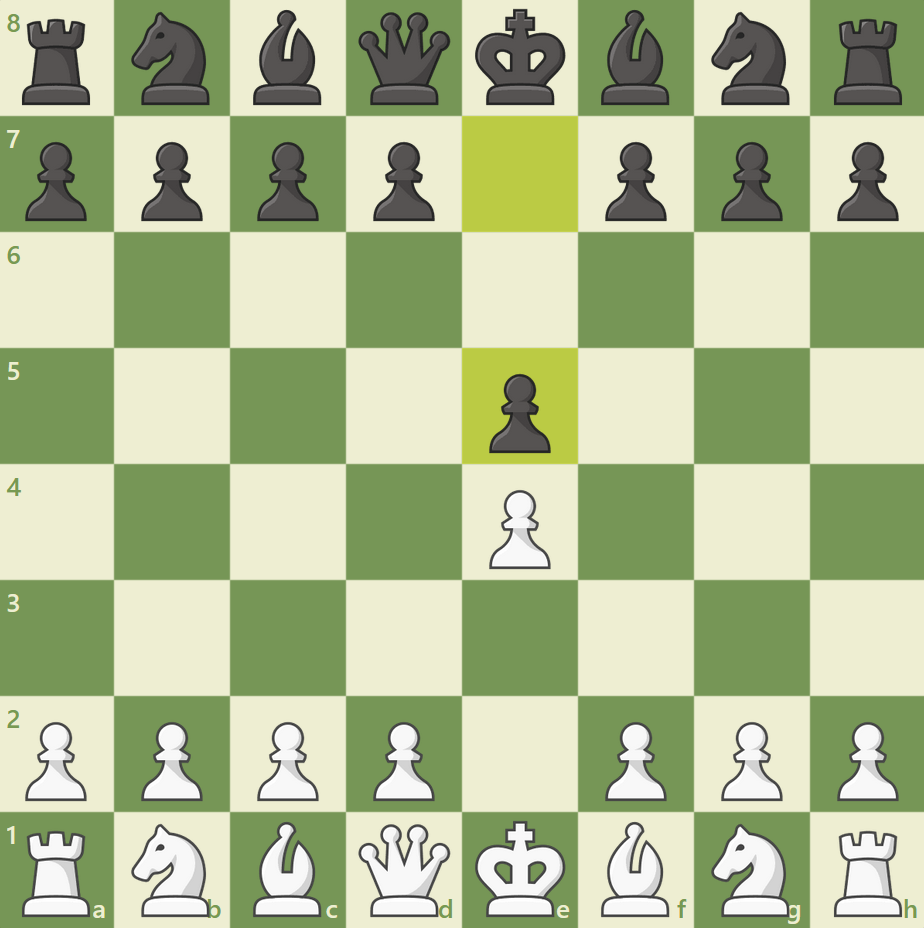
Another excellent move: restoring the equilibrium, and doing the same things for his position as white did to his.
2. Qh5
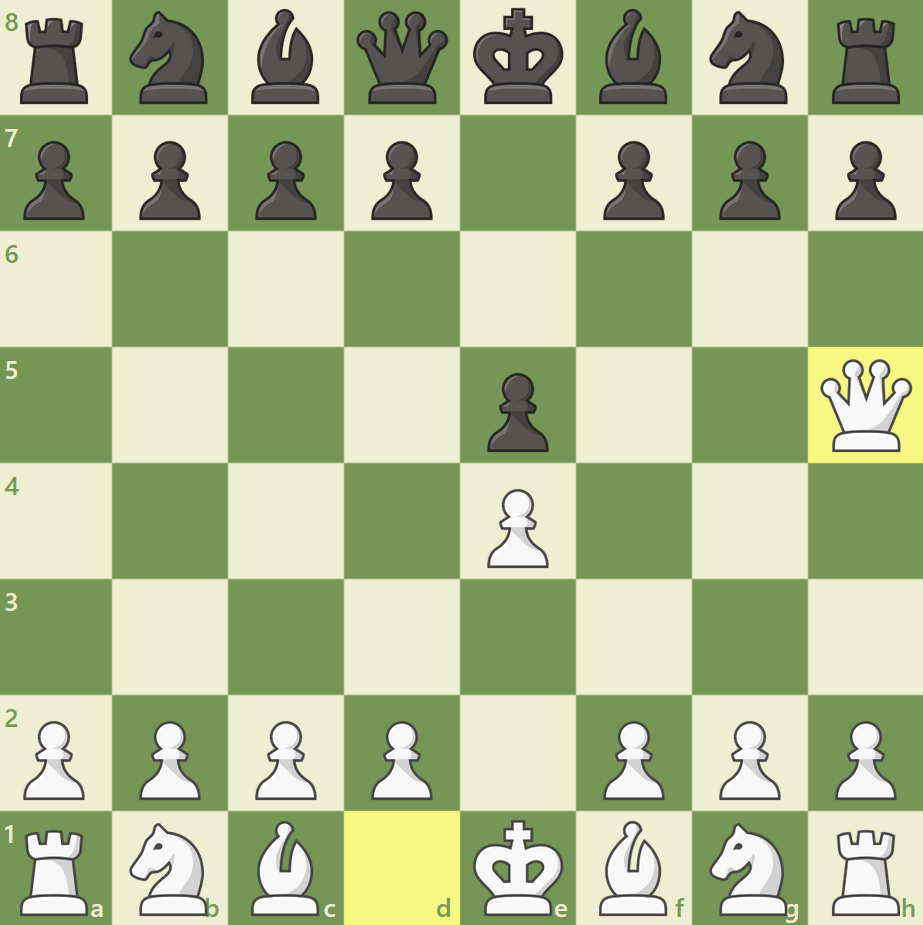
White shows his intentions: by targeting the weak f7 square and undefended e5 pawn, it’s clear that he’s trying to set up the Scholar’s mate. However, since Black is unaware of this, this is what happens.
2… Nc6!
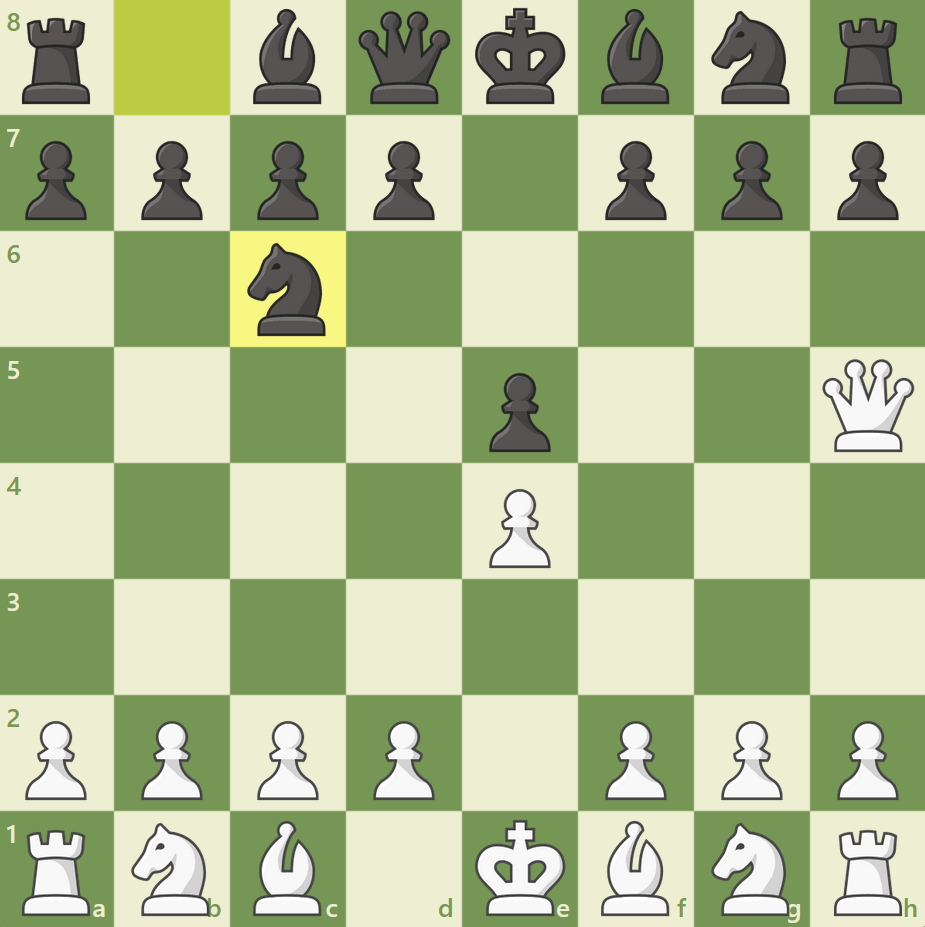
Great move! Developing a piece and defending his undefended e pawn. Black is resisting the temptation to fall into losers such as 2… g6? (attacking the undefended queen). This is followed by 3. Qxe5+!
As we know, check overrides everything. Since Black cannot move his kind up to e7 (he is still in check there, so that is an illegal move), he has to block the king with either the queen, knight, or bishop: but it doesn’t matter. Next turn, black will capture the undefended black rook on h8 with his queen, gaining a 6 point advantage in force.
The moral of the story? Play 2..Nc6 first! Now white cannot capture the e5 pawn, as 3. Qxe5? Nxe5! Wins the queen. So far, black is doing great. Let’s see how the game proceeds:
3. Bc4
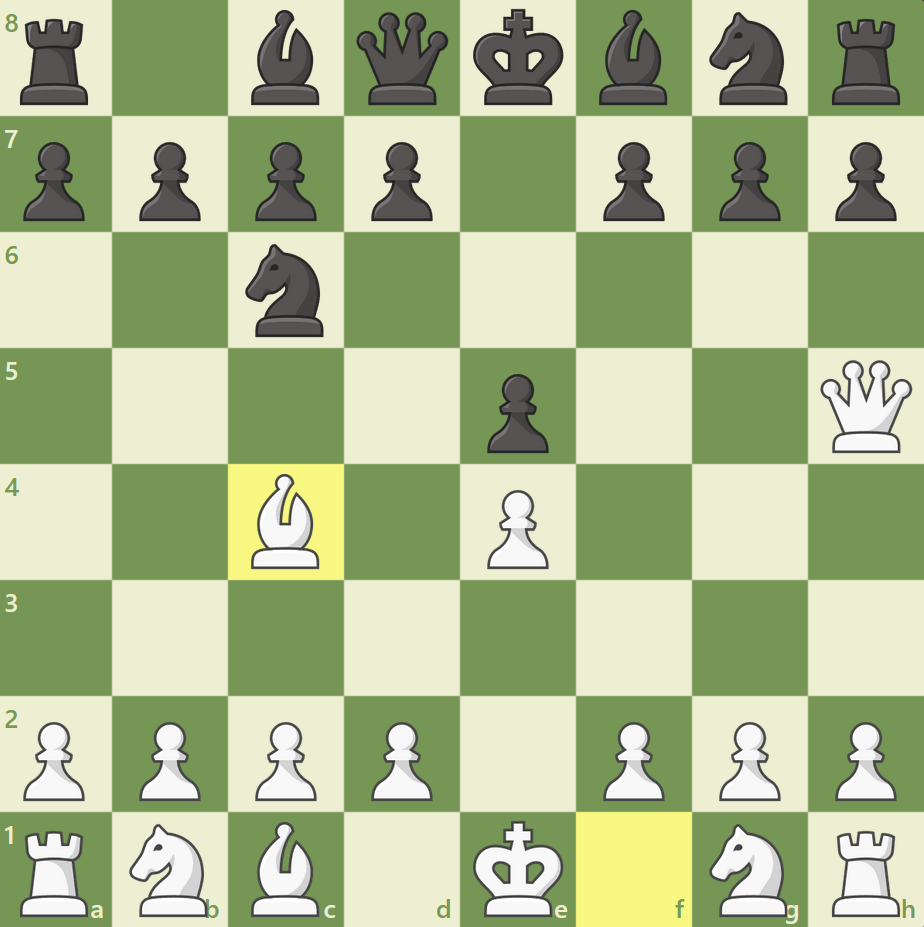
White develops his bishop. Do you see the deadly threat?
3… Nf6??
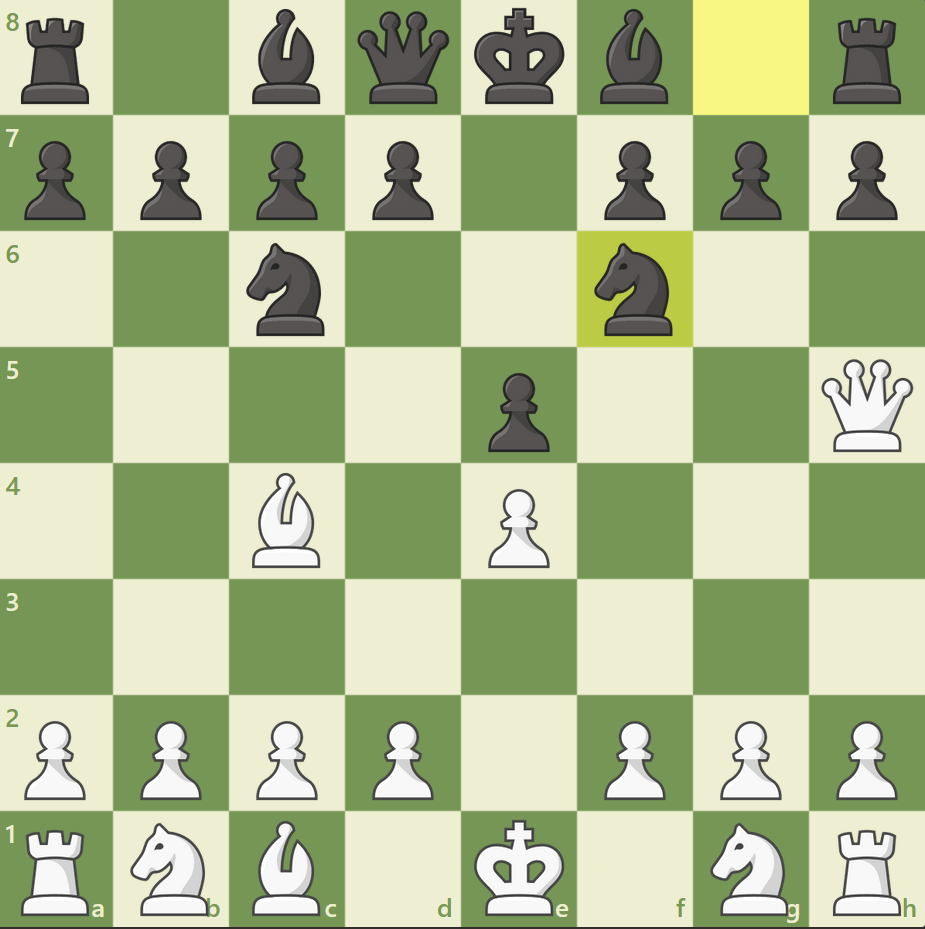
…And black doesn’t see it. Feeling confident, he attacks the queen with his knight.
4. Qxf7#!
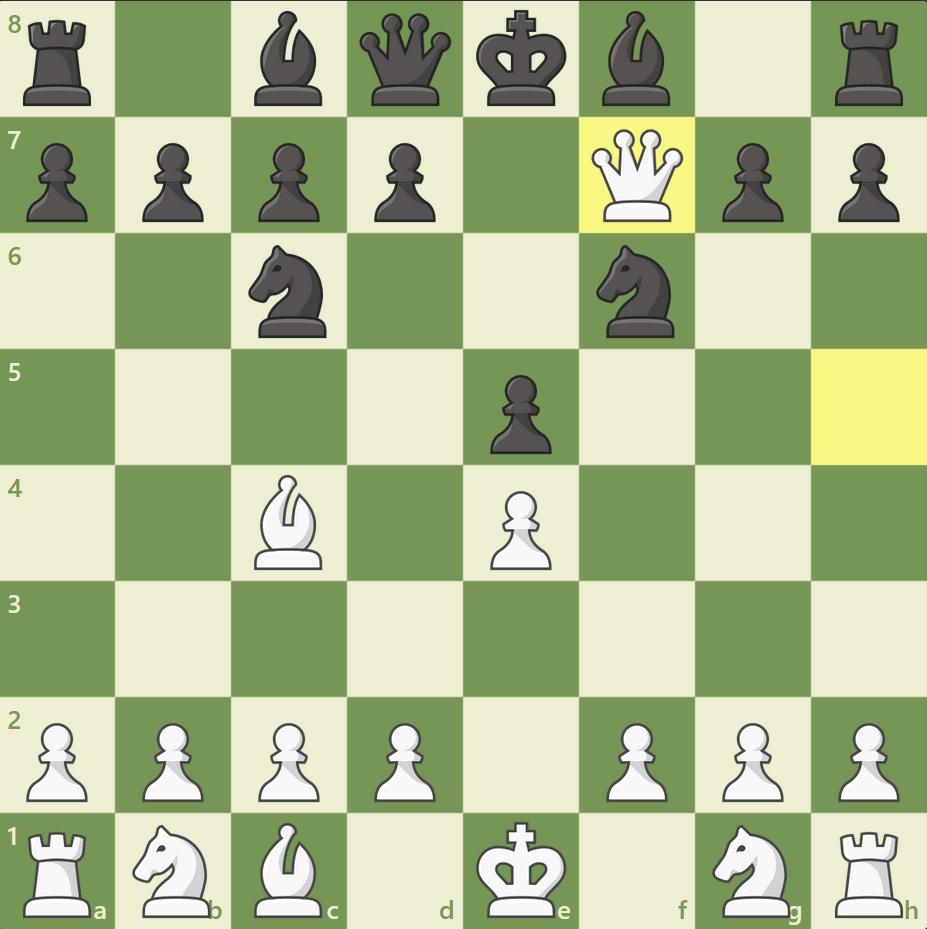
Oops! That’s Checkmate! But first, let’s review to see if this is actually the end of black, or whether he can escape:
- Is there a piece that can capture the queen? No, there isn’t: the king cannot take the queen because the queen is defended by the bishop.
- Can the king move away from the queen’s attack? No: the spaces available are all covered by the queen.
- Can a piece block the queen? No: since the queen is right next to the king, a piece cannot block the queen.
Therefore, black is checkmated, and the game is lost. Where did black go wrong, to lose in only 4 moves?
Well, while black did a good job in recognizing the original threat to his e5 pawn, he missed the fact that the bishop were attacking the f7 square twice, while black only had one defender: his king.
Lesson learned: be careful!
Now, let’s see how black can defeat this opening. As an beginner, you will encounter this extremely often, so you will rack up many easy wins.
- e4 e5 2. Qh5 Nc6! 3. Bc4
We have reached the same position as last time. This time, however, black demonstrates his knowledge of the opening to counter this opening.
3… g6!
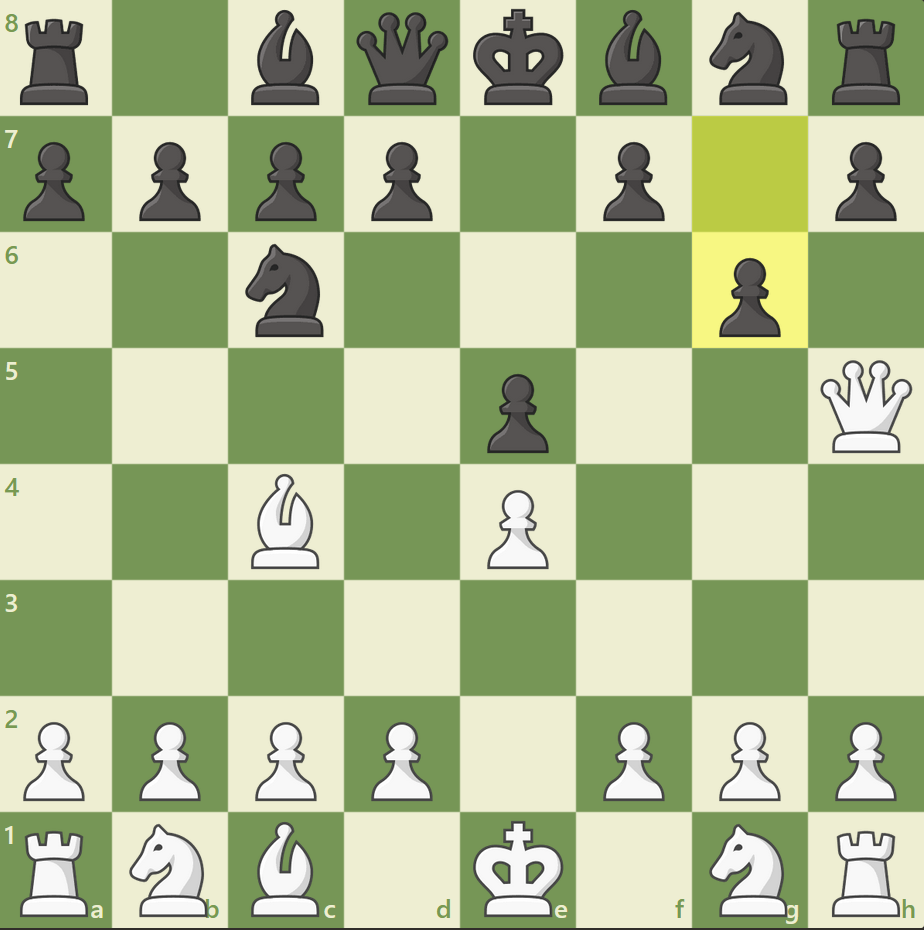
Countering the queen’s path to f7. Now there is only one attacker on f7 (the bishop), so white cannot pull off the checkmate. Obviously, not moving the queen would result in disaster, so white pulls the queen back.
4. Qf3
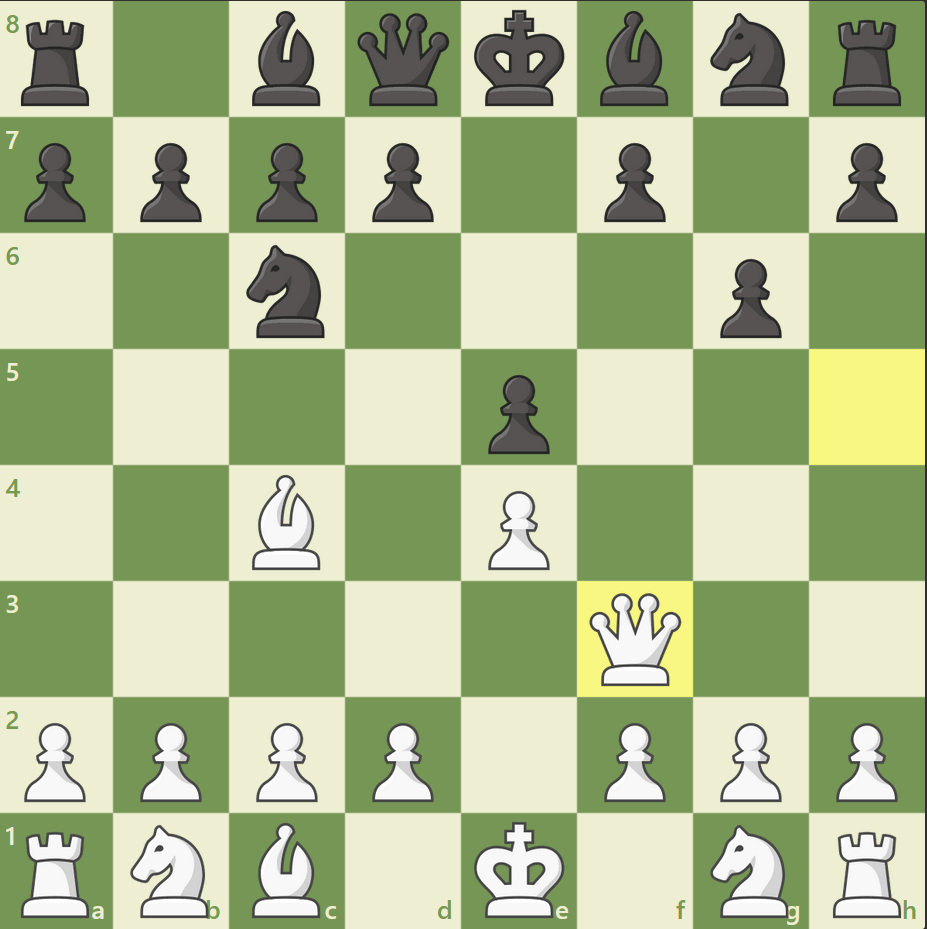
Renewing the threat against f7. White is threatening Qxf7# on the next move again. However, this attack has much less bite than the previous threat, and black can parry this easily. There are many ways to prevent checkmate – I encourage you to try to find all of the ways – but the best move for black in this position is:
4… Nf6!
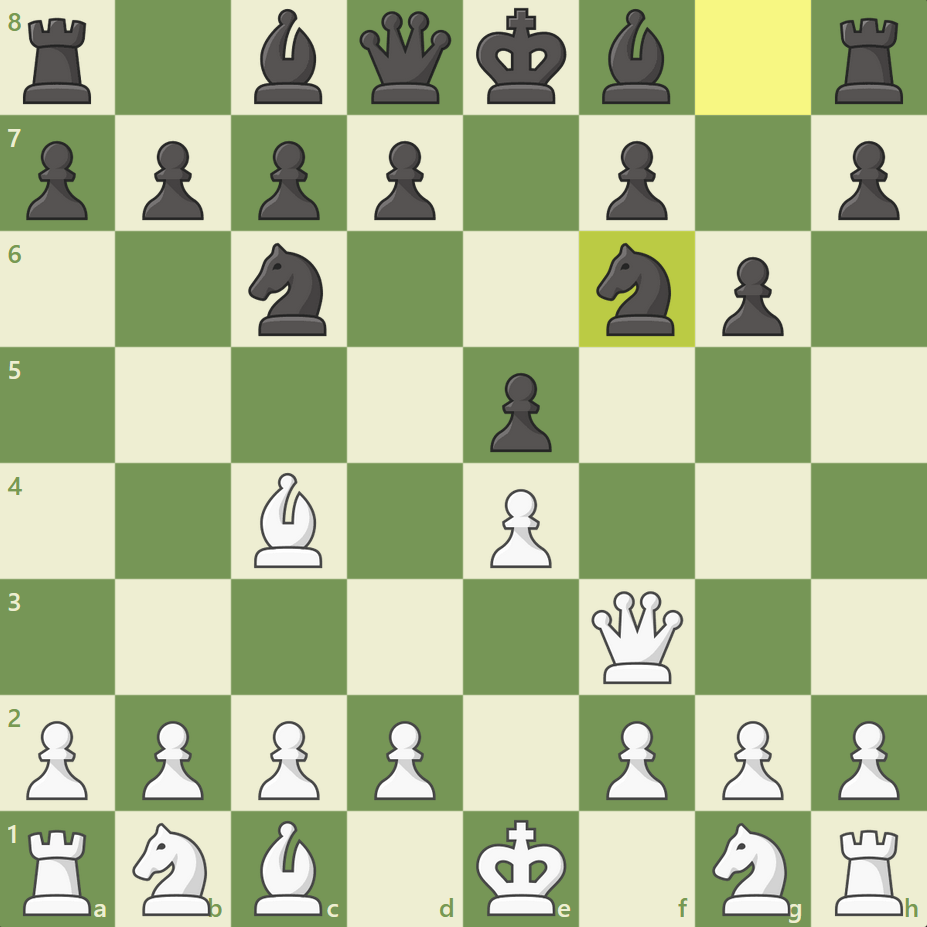
An excellent multipurpose move! Not only does black develop his kingside pieces, but he also blocks the white queen’s threat against the f7 square again. Obviously 5. Bxf7+? Kxf7 leaves white with few attackers to exploit the slightly loose position of the white king (black has easy development and an easy escape route: the king can move back to g8 eventually), and 5. Qxf6? Qxf6 (black’s queen was defending the knight) is no good. So, white tries yet another attack on f7.
5. Qb3
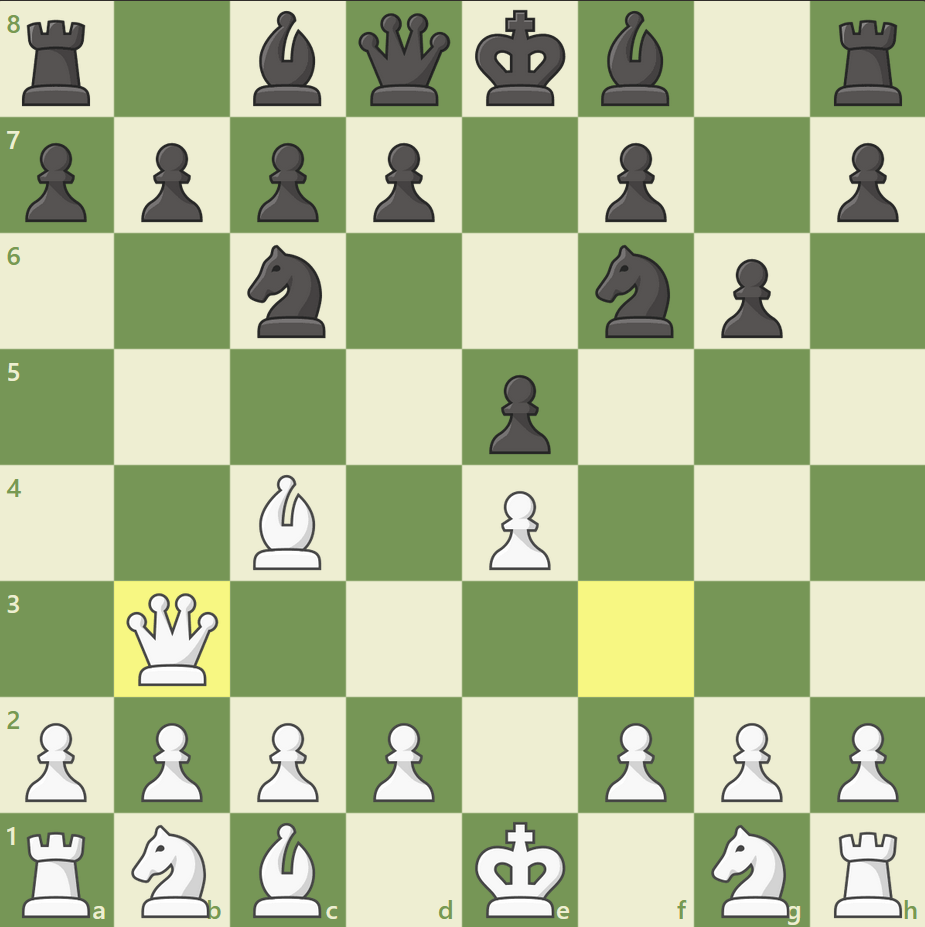
White is threatening to take on f7 yet again! However, this time, taking on f7 is not checkmate because white takes with the bishop first, which gives black the leeway to launch a devastating counterattack. Observe.
5… Nd4!
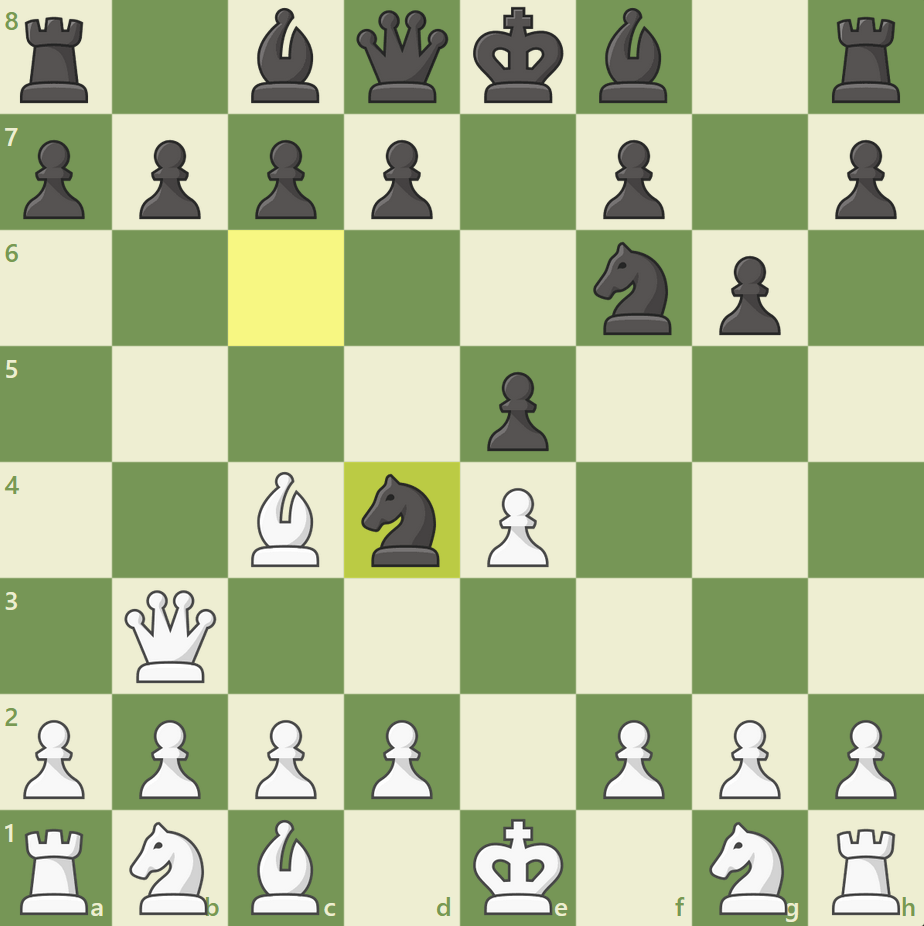
This threatens both the queen and the bishop… but wait. Hasn’t black left the f7 square undefended? White has two attackers, while black only has one defender – the king. If the bishop takes the pawn, the king will be put in check. As we all know, getting out of check overrides everything, so black doesn’t have the time to take the queen if it moves. Has black made an error?
6. Bxf7+
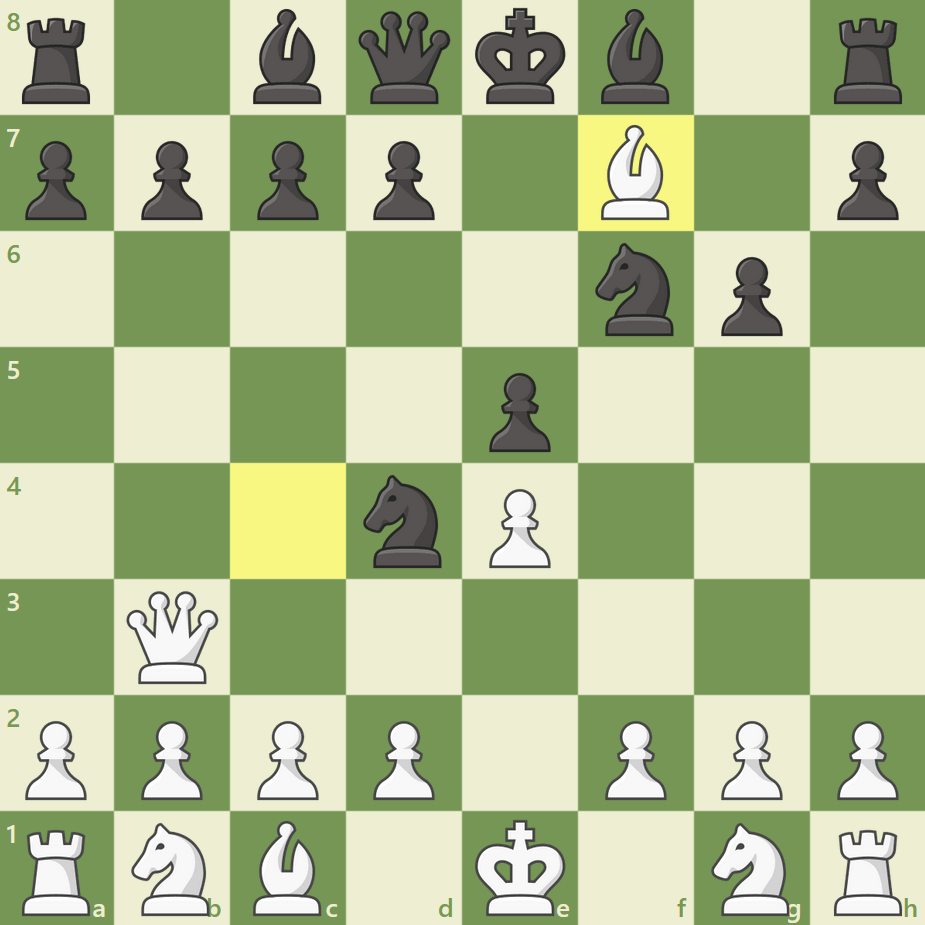
White takes his chance.
6… Ke7
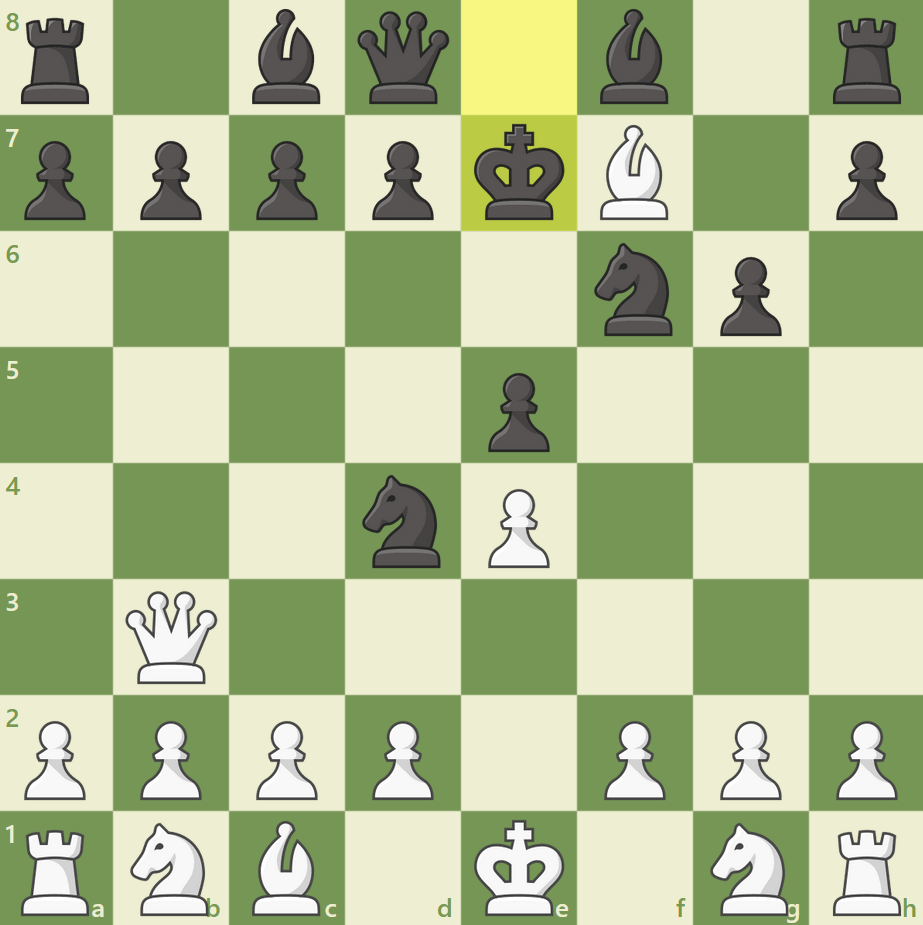
In chess, this is what we would call a forced move: in this case, the king only has one space to move to, so it has to move there.
Let’s take stock of the position: white must be feeling extremely satisfied with his position. He’s a pawn up, his bishop and queen are in threatening positions, and black’s king is displaced. However, white knows not to be too overconfident: his queen is being attacked by the knight. Knowing that his queen has to defend the bishop, he only has one square.
7. Qc4
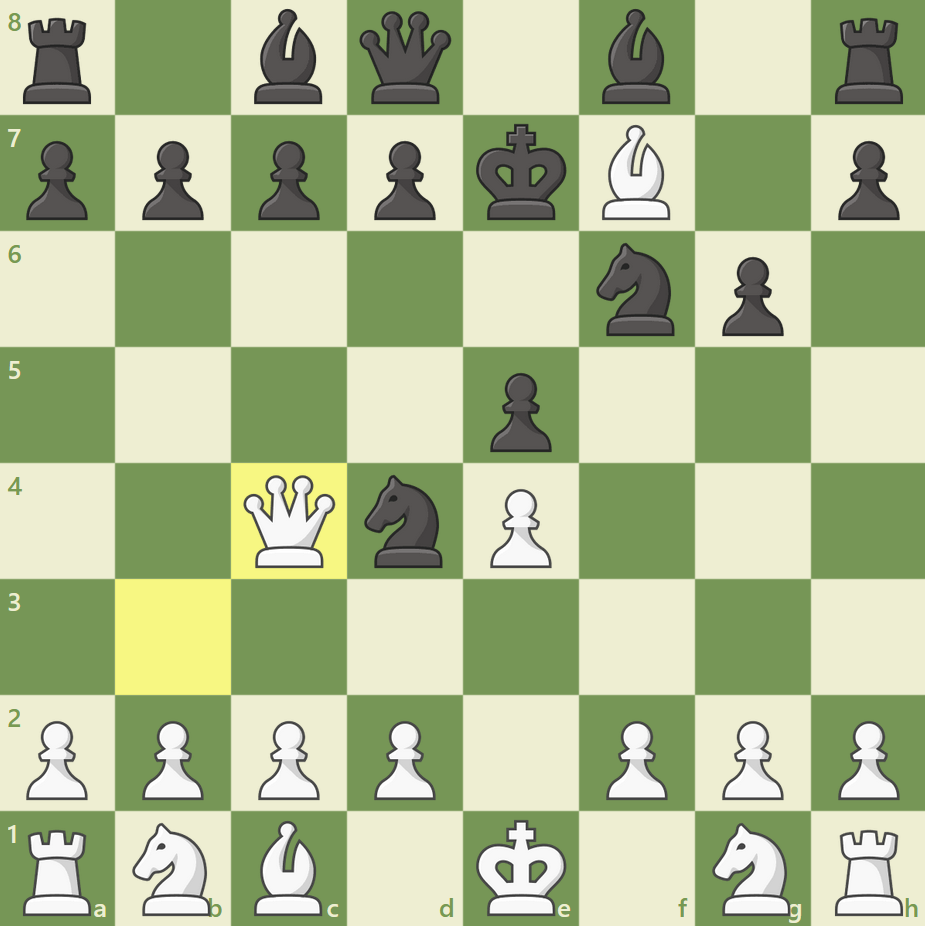
The only safe move that is defends the bishop and moves the queen out of danger.
7… b5!
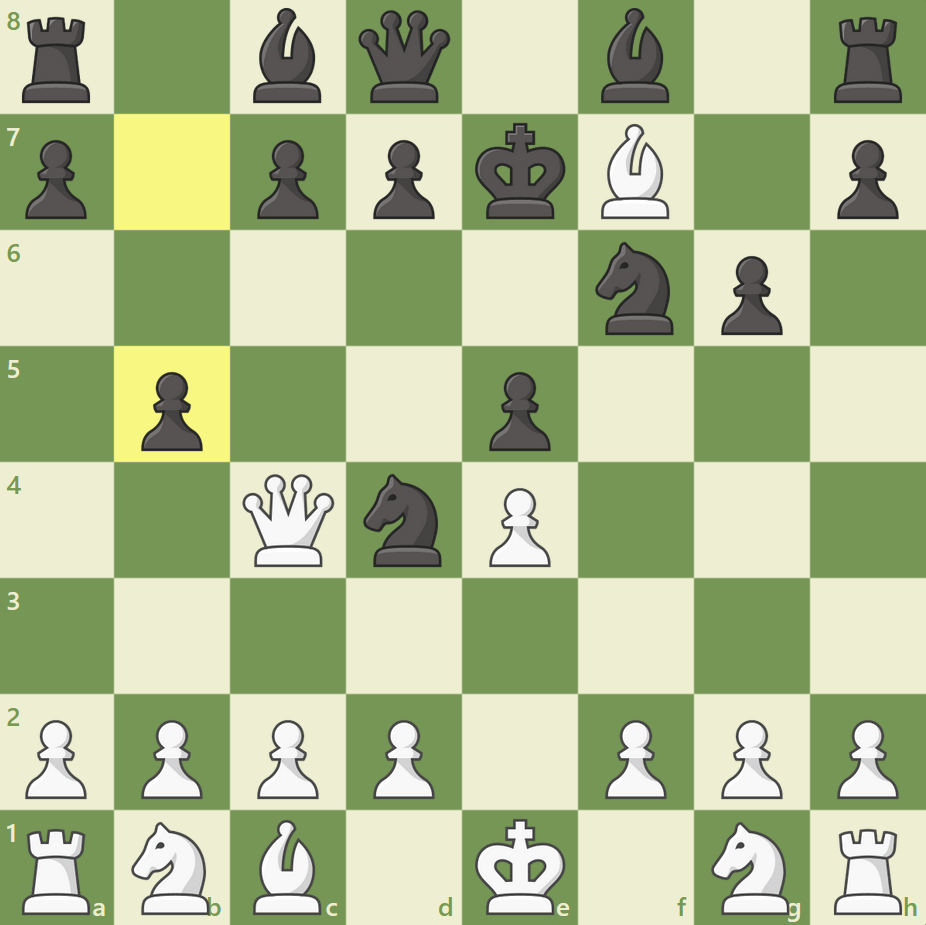
Attacks the queen, which has strangely run out of good squares to go to! Let’s see here.
Question 1: Can the White queen maintain defense of the bishop?
Answer: No. All the squares across the a2-g8 diagonal are covered by black pieces.
Question 2: Can white take anything in exchange for the bishop?
Answer: No. All the pieces are defended in Black’s territory: the b5 pawn by the knight, and etc.
So, white has no choice but to move his queen out of the way. Something you should note here (and will be important later) is that although the pawn is worth much less than the queen, she is still being forced to run away from it.
After this move, a sequence similar to this may happen.
8. Qc5+
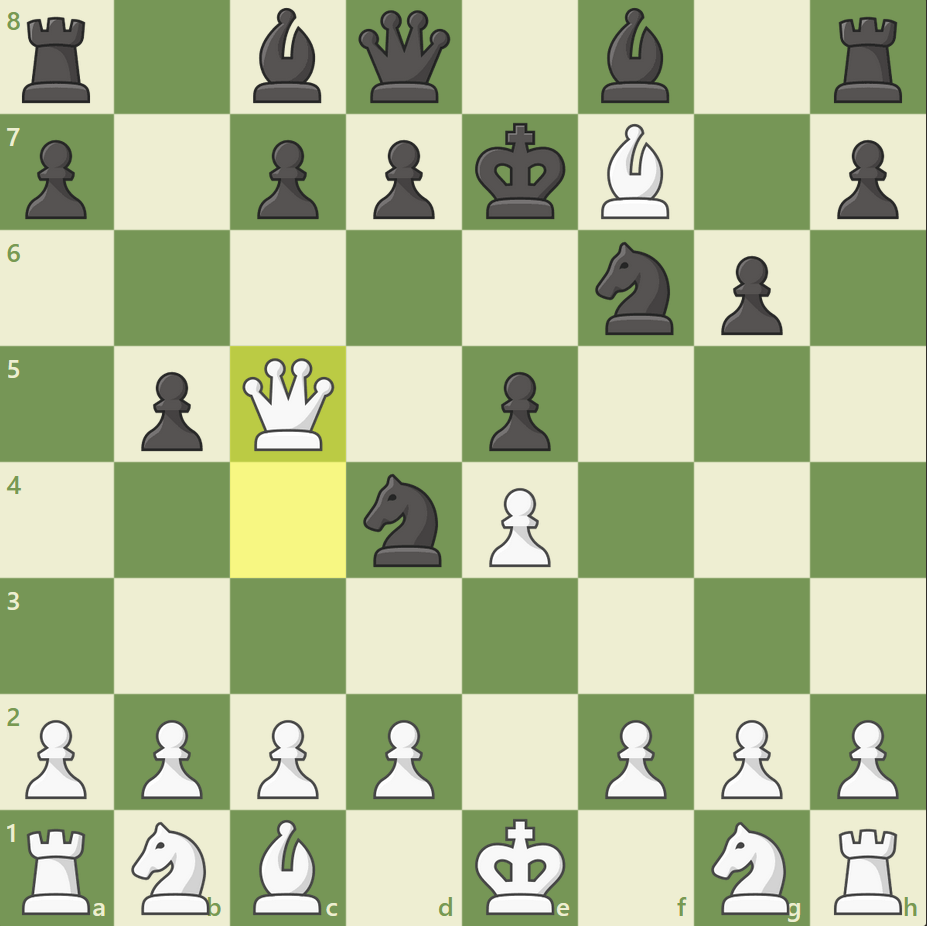
White gives a check, not knowing what to do now.
8…. Kxf7!
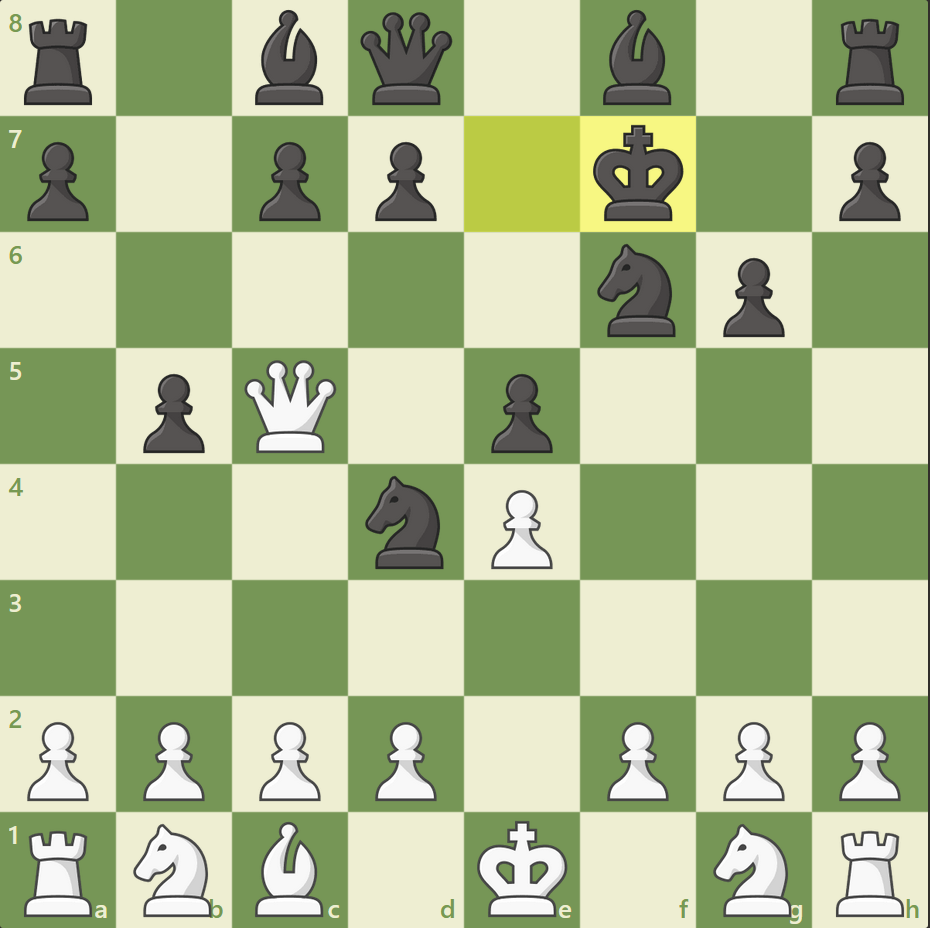
Taking the bishop and getting out of check. Now black has an advantage in force, and point count. He has more pieces developed, and he’s also up in material: a drastic reversal of fortune for white. This king move also uncovers the bishop’s attack on the queen, which has to move again next turn.
9. Qc3
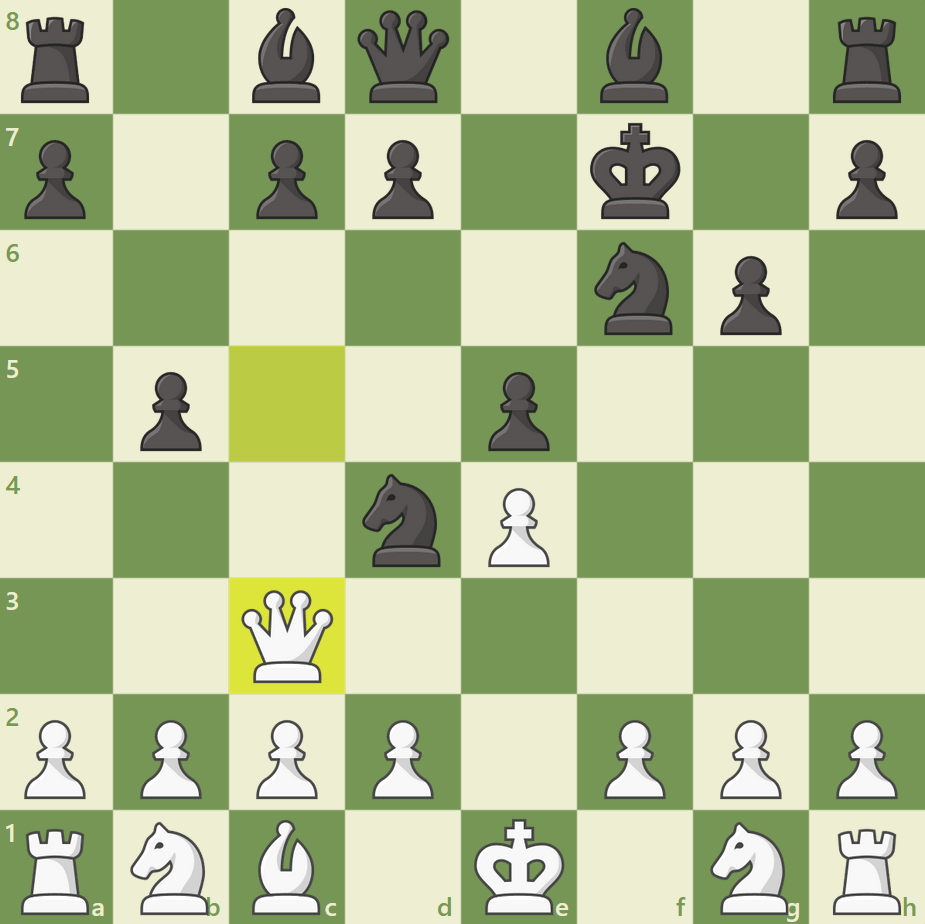
Getting out of the way. White doesn’t notice 9. Qxe5, taking the undefended e pawn (this is for the purposes of this demonstration). However, that would also lose to 9… Nxc2+ 10. Kd1 Nxa1, with an overwhelming advantage in force.
9… Bb4!
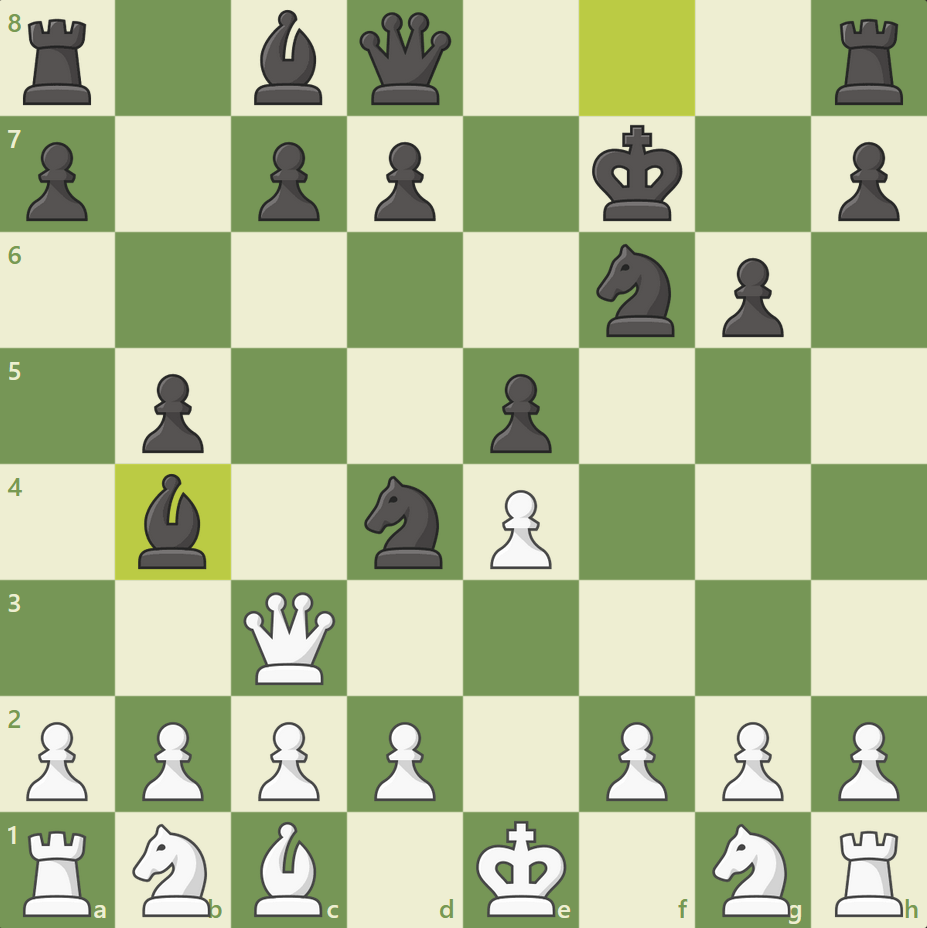
Attacking the queen, and setting up an extremely clever trap. White could simply move the queen out of the way with something like 10. Qd3, but isn’t the bishop undefended?
10. Qxb4
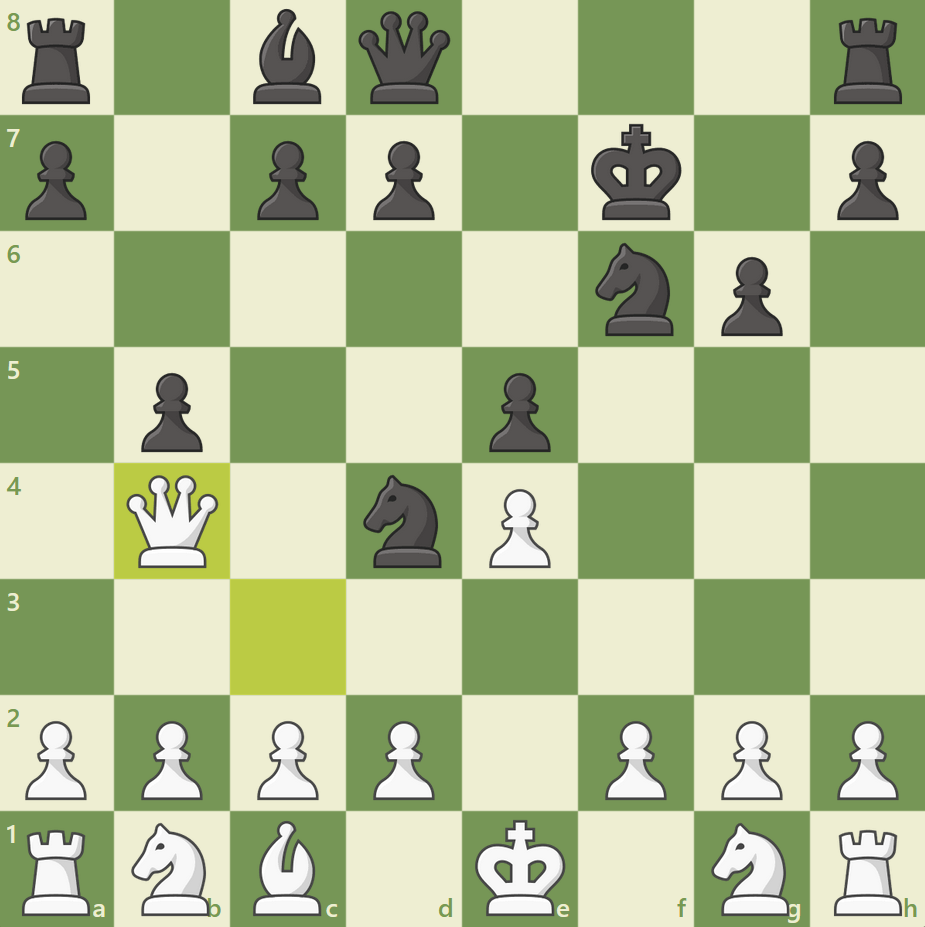
White takes his chance…
10… Nxc2+!
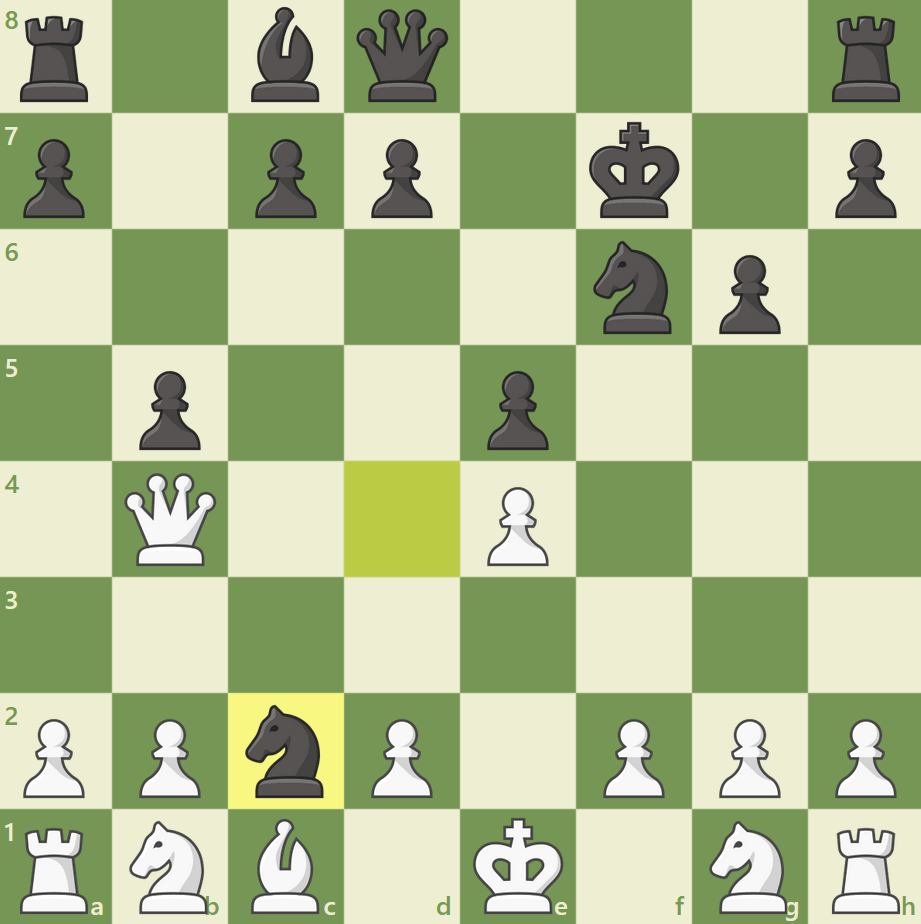
Bam!
The purpose of black’s 9th move is revealed: it turns out that the bishop move drew the queen away from the defense of c2: a crucial square. Now, the king is now in check, so it has to move next turn: but the queen is also being threatened at the same time. This is a tactic known as a fork: a piece makes two or more threats at the same time. It’s one of the most potent and common tactics there is.
11. Kd1 (forced – 11. Kf1 makes no difference) Nxb4!
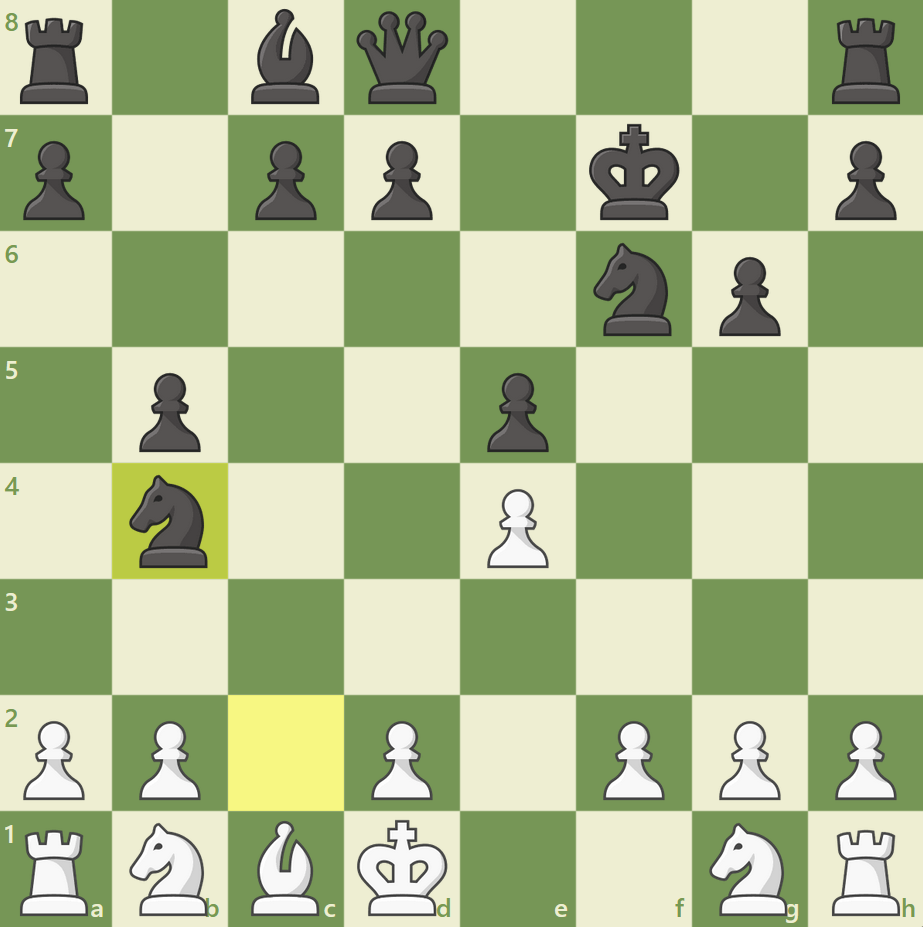
Black could have also taken the rook this turn, but since the queen is worth higher value, taking on b4 was clearly the best. Now black has an overwhelming advantage in material and development, and should win easily.
