A Disclaimer About Checks
After reading about the power of check, it makes sense to check your opponent at every turn, checks are not always good – in fact, they could even be harmful to your position.
A check is usually not the best move if:
-There is no good follow up to your check.
-The opponent has an easy counter.
-And it either aids the opponent in their development at no cost, or hinders your own development to your own detriment.
These are all general rules, and take some practice and experience to fully understand this.
Since this is a more advanced concept, we’ll only be taking a brief look at this. However, a general overview is very important, so you don’t go blindly checking the opponent to your disadvantage in games.
Let’s look at some examples.
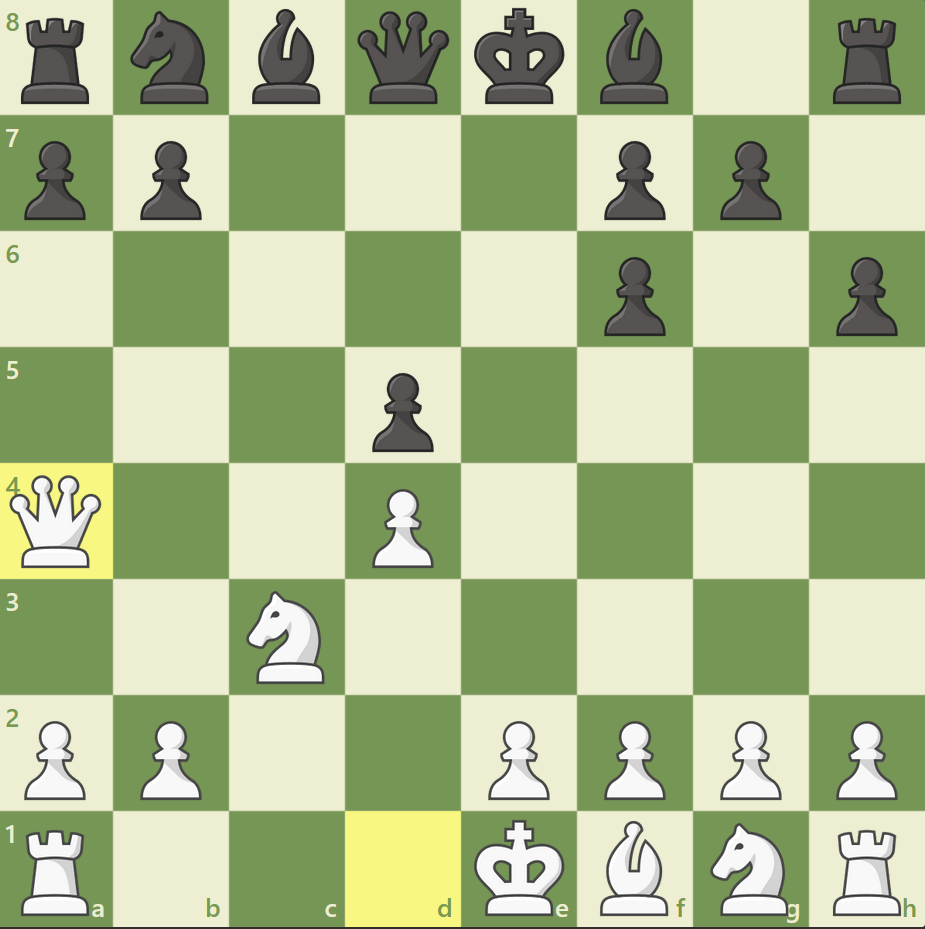
In this position, white has just played 7. Qa4+. While this certainly seems plausible at first: Black has two possible counters that not only deflect the queen’s check, but also aid in his own development. For example, after 7… Nc6, (It’s also possible to play 7… Bd7 and 7… Qd7. Bd7 is fine, but allows 8. Qb3 with an attack on the B pawn, after which Black has to be a bit careful. On the other hand, 7.. Qd7 loses a pawn after 8. Qxd7 Bxd7 9. Nxd5), the position looks like this:
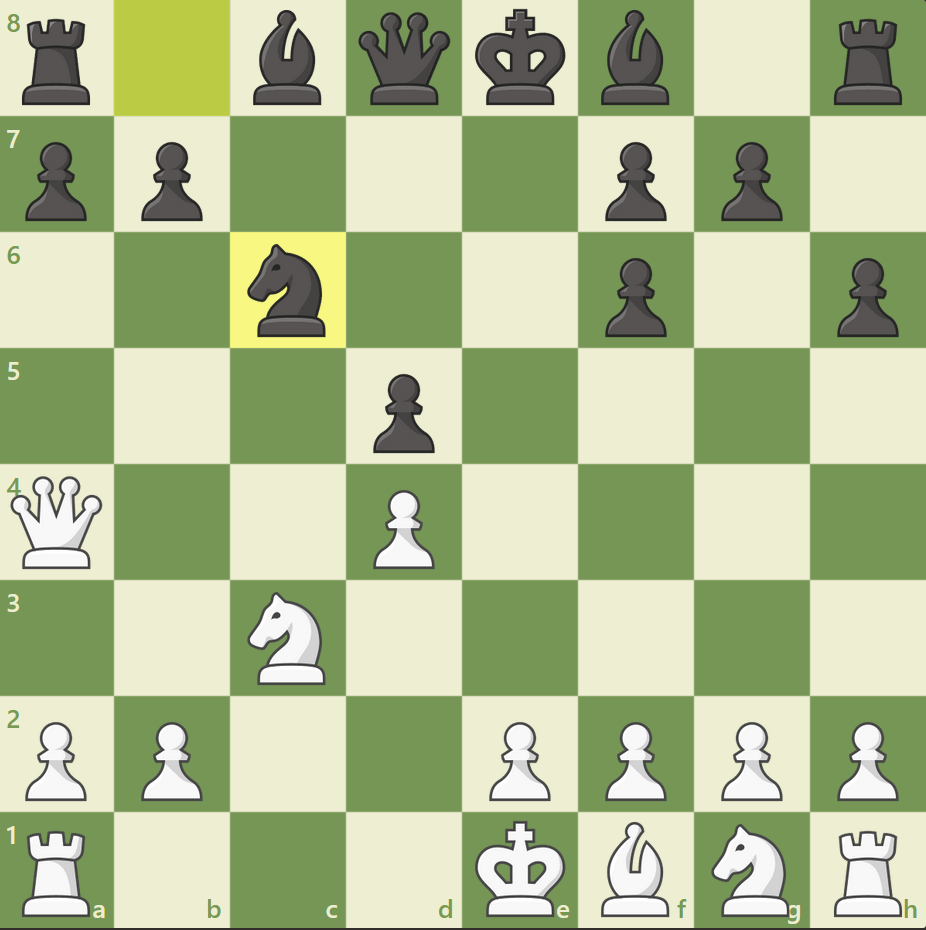
Although the knight is pinned, White has no way to take advantage of it.
Therefore, by checking on a4, White has wasted a move, and allowed Black to catch up in development. After some moves, the position might look like this:
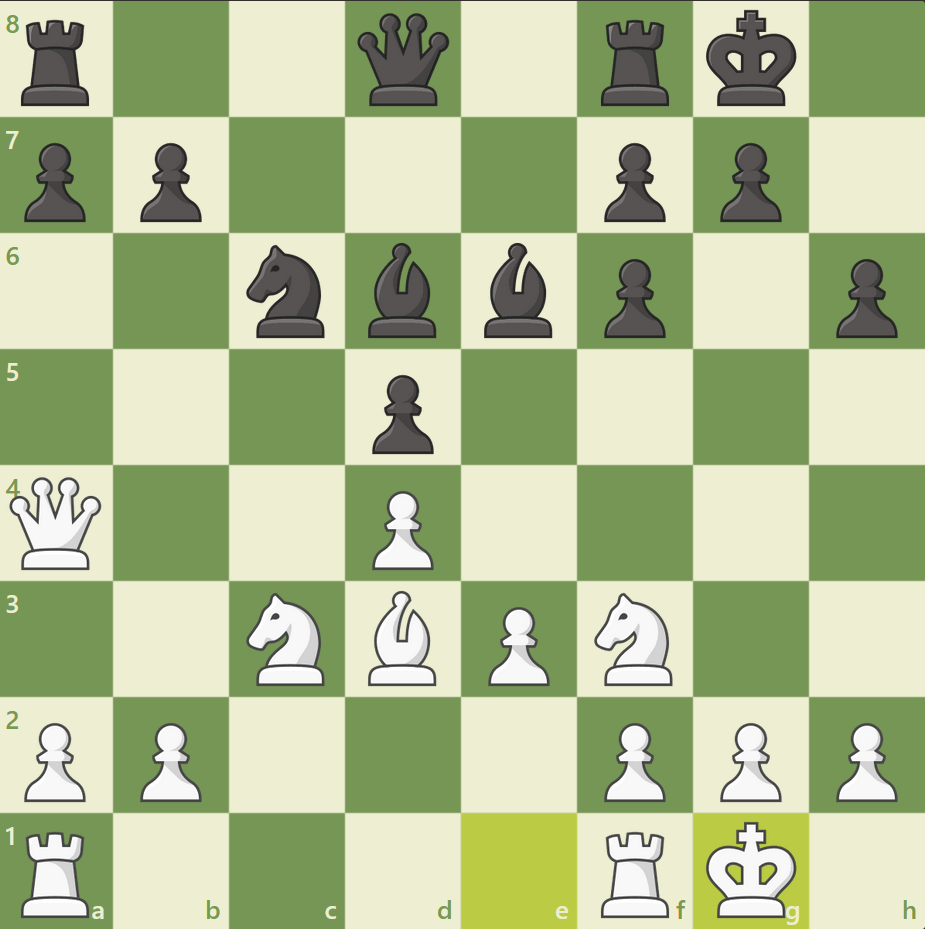
Despite Black’s doubled pawns* and isolated d pawn*, the position is equal.
(*: See the section about pawns).
Let’s take a brief look at one more example before moving on. Again, this is a rather advanced concept for the moment, but it’s better to be familiarized with it early.
Here is the position:
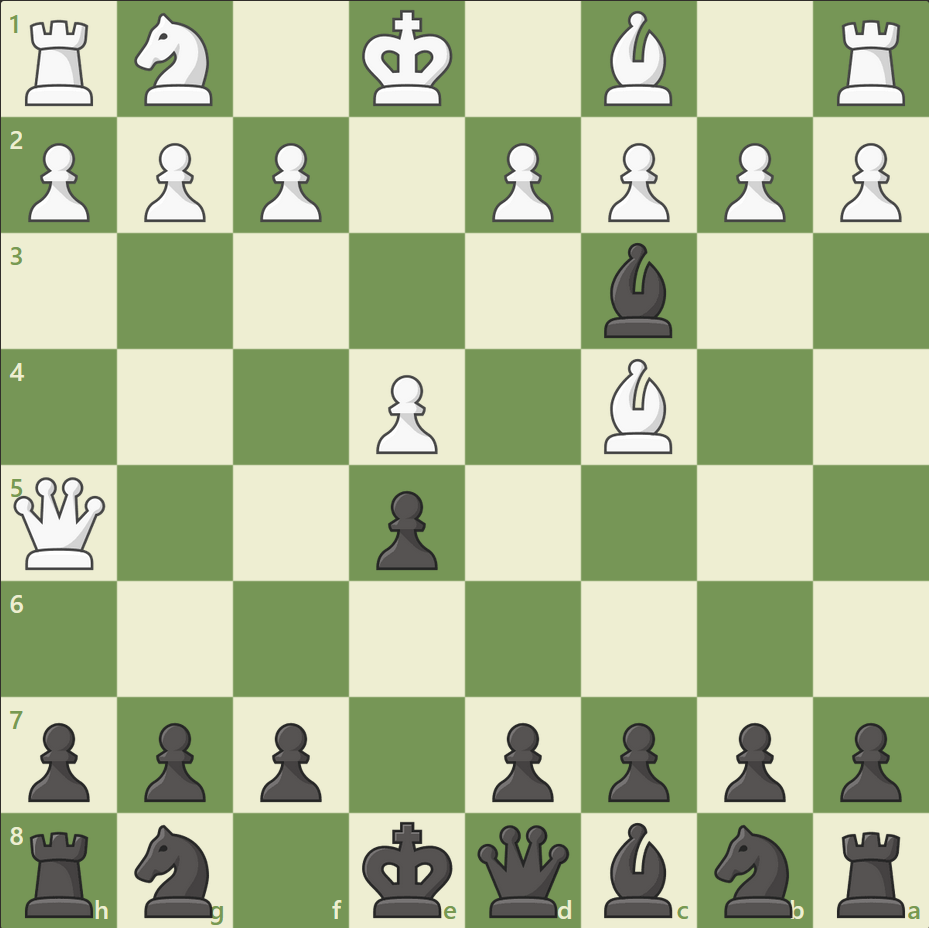
Black’s last move was to take a knight on c3. Now, White should have captured between either pawn, but he decided to throw in Qh5 instead. This seems very clever, because if Black moves his bishop to safety, White simply checkmates him. However, this threat is easily parried, and black gains quick equality from this exchange.
Set this up on a chessboard, and follow the notation:
4… Qe7 (defending against mate) 5. dxc3 (if White doesn’t take now, then Black moves his bishop next turn, preserving his material advantage). 5… Nf6 6. Qh4 0-0.
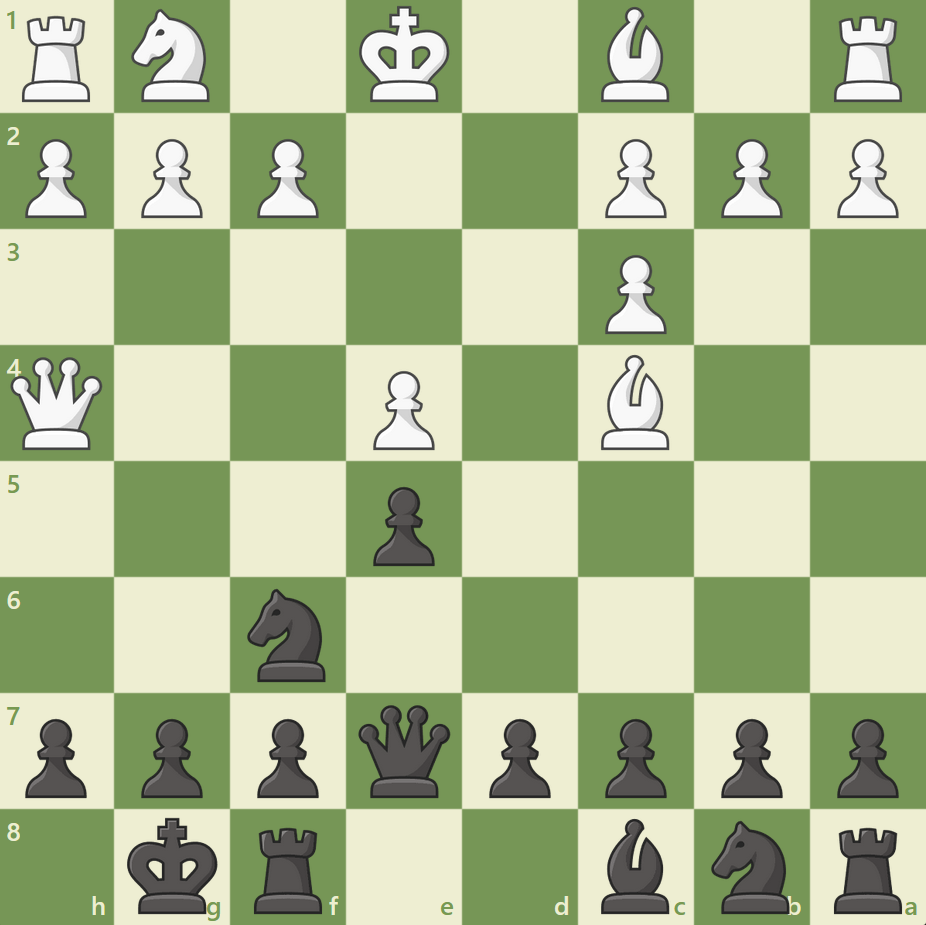
And the position is equal.
While these two examples may seem relatively mundane, this does illustrate an important concept. Sometimes, giving check or threatening check may backfire, or give up an advantage you previously had.
