Essential Openings: Ruy Lopez
We will be starting our examination of Essential Openings by looking at the Ruy Lopez: the most popular 1. e4 e5 variation, and therefore one you have to be familiar with! We will be going over the fundamentals of this openings, and moves both White and Black should play. Let’s get started!
Small disclaimer: the following openings sections will include lots of analysis, so be prepared to stay focused, and play through a lot of moves!
As mentioned, this opening arises from the beginning moves 1. e4 e5. Let’s take a look at the next moves that lead to the Ruy.
2. Nf3
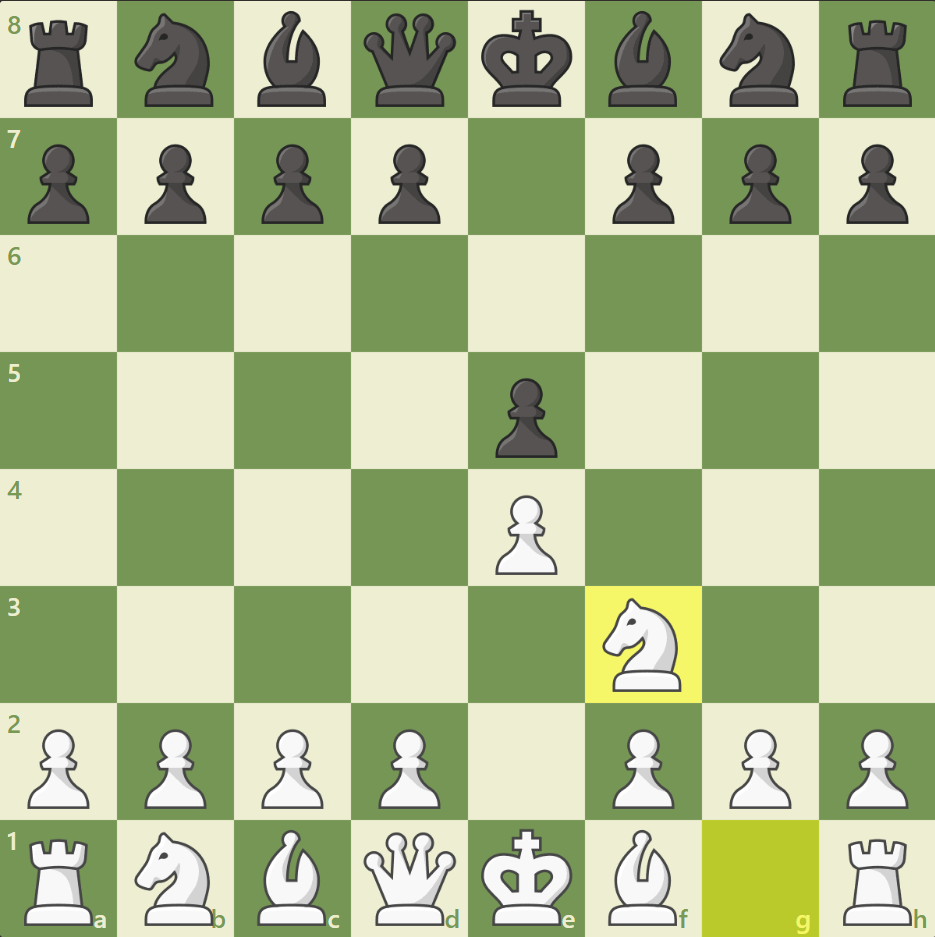
Clearly the best follow up move, as previously discussed: attacking the undefended e5 pawn and developing White’s kingside.
2… Nc6
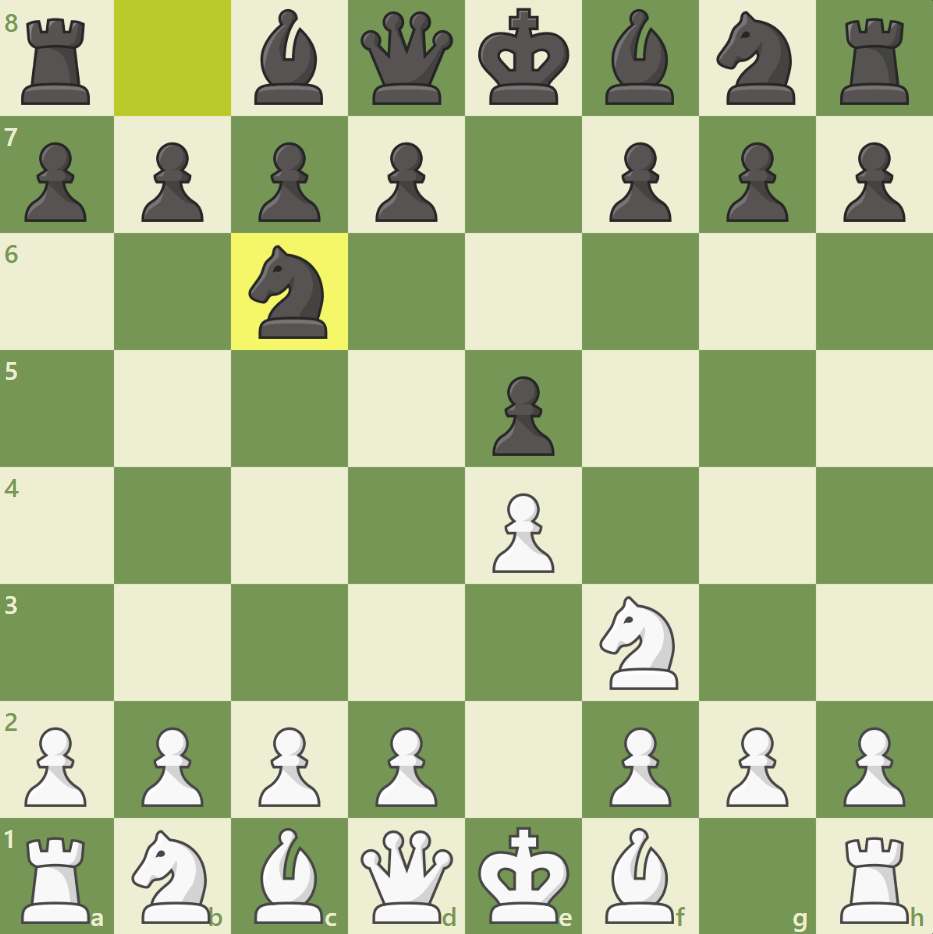
The best move for Black to defend the pawn. You might also see 2… d6 as another way of defending the pawn, but this allows White to take the center with 3. e4, threatening to take on e5 since the Black pawn is attacked twice and only defended once, winning a pawn for White. Some sample variations may go as follows:
3… exd4 (exchanging pawns seems like a good policy for Black.) 4. Nxd4 (4. Qxd4 allows 4… Nc6! attacking it with tempo. 4… Nf6 (attacking the e4 pawn, which is currently undefended.) 5. Nc3 (defending the pawn) 5… Be7 (trying to castle.
Other moves don’t turn out as well: for example, if Black tries to play 5… c5? – this move is reasonable, trying to gain control of the center and attacking the Knight – however, it falls to 6. Bb5+! Black cannot play his Knight to c6 to block the check, so he has to play either 6… Nbd7 or 6… Bd7. Then, White can play a very powerful move: 7. Nf5! and White has a large advantage.
Black can try other moves, such as 5… Bg4 (attacking the queen), 5… Nc6, or 5… Nbd7. It might turn out like this:
5… Bg4 6. Be2 Bxe2 (most people will NOT retreat the Bishop here.) 7. Qxe2 Nbd7 8. Bg5 Be7 9. 0-0-0! 0-0 10. h4! When White has a powerful attack.
5… Nc6 6. Be3 (Taking is also good, but be careful of the doubled C-pawn potentially providing for a d5 pawn break.)
6… Be7 7. Be2 0-0 8. 0-0, when White has a slightly more active position.
5… Nbd7 6. Be3 Be7 7. g4!
A very ambitious move that essentially prevents Black from castling. To wit:
7… 0-0? 8. g5! Ne8 9. h4, when White has an insanely strong attack.
Phew, that was a lot of analysis! Feel free to take a break in order to process all the information. I recommend (if you are not already doing this!) following these variations on your own chess board to see how these play out. Try to calculate further than the lines I have provided you, and ask yourself these questions:
1) WHY are these moves considered good/bad?
2) WHAT purpose does White/Black’s move have?
3) COULD White/Black have played a better move? If so, what move(s) would that be?
I would recommend writing down your answers to these questions in a notebook, and then checking it with either the computer, or other resources available.
Anyways, we have digressed quite a bit. We haven’t even covered the actual Ruy Lopez yet, so let’s do that.
The Ruy is defined when White plays 3. Bb5.
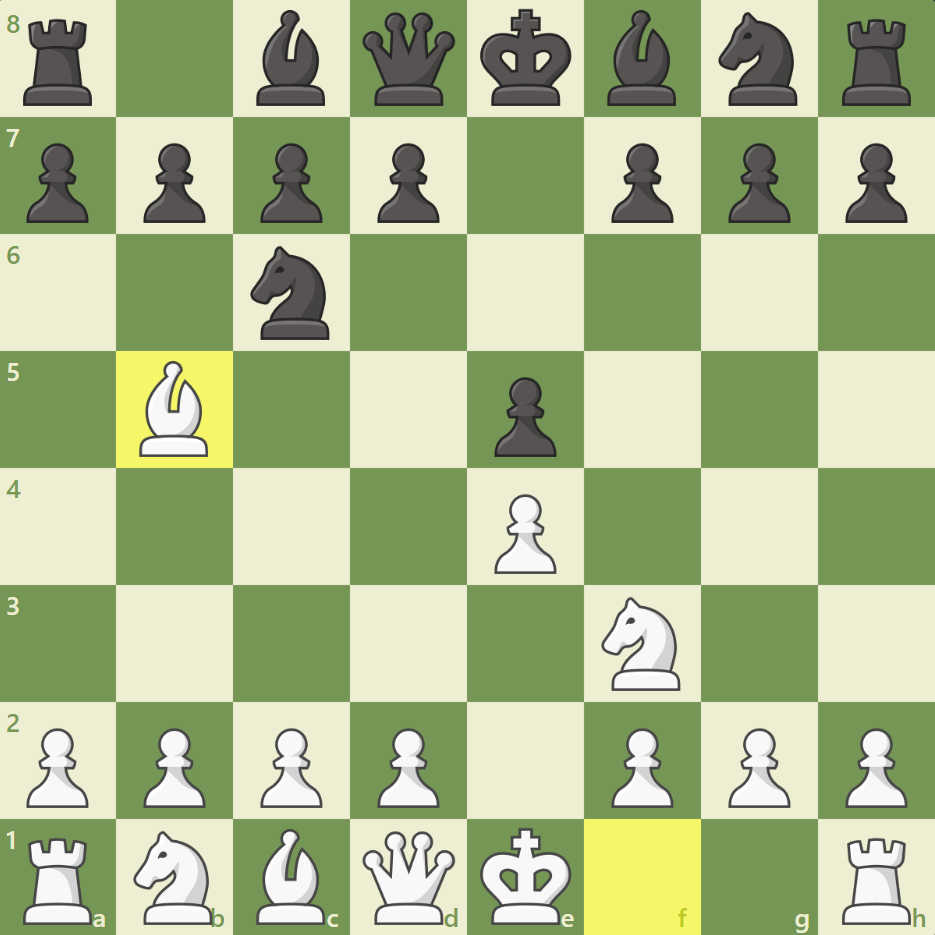
Perhaps an obvious third move, as it not only develops the Bishop to an active square, but also attacks the c6 knight. However, there is a lot more to the opening than meets the eye. Black wants to move his d-pawn in order to control the center eventually; however, then White’s bishop will pin the c6 knight to Black’s king. This move is not meant to create an immediate threat, but rather meant to create subtle pressure in Black’s position. So the question remains: how can Black deal with this?
Something important to note is that White is not threatening to win the e5 pawn right away, hence why I said that this move is not meant to create an immediate threat! For example, if Black elects to push the Bishop away with 3… a6, then taking with 4. Bxc6 dxc6 5. Nxe5 Qd4! 6. Nf3 Qxe4+ 7. Qe2 (7. Kf1 is met by 7… Bg4!) 7… Qxe2 8. Kxe2 Bd6, when Black has a slight advantage. White’s development is fairly awkward (especially the King on e2), while Black develops his pieces to active squares very quickly and will gain a lead in development.
Instead of taking the pawn on e5, White can instead play 5. 0-0. Then, Black will probably defend the pawn by playing 5… Bd6. Known as the Exchange Variation, White is hoping to play a Queen-less middlegame/endgame with a slight advantage. However, this is not very dynamic, so I would NOT recommend this opening line to you. Let’s move on!
Black can deal with this opening in a variety of ways, but we’ll be looking at the most common moves: 3… a6 and 3… Nf6. Let’s start with the most common response, 3… a6.
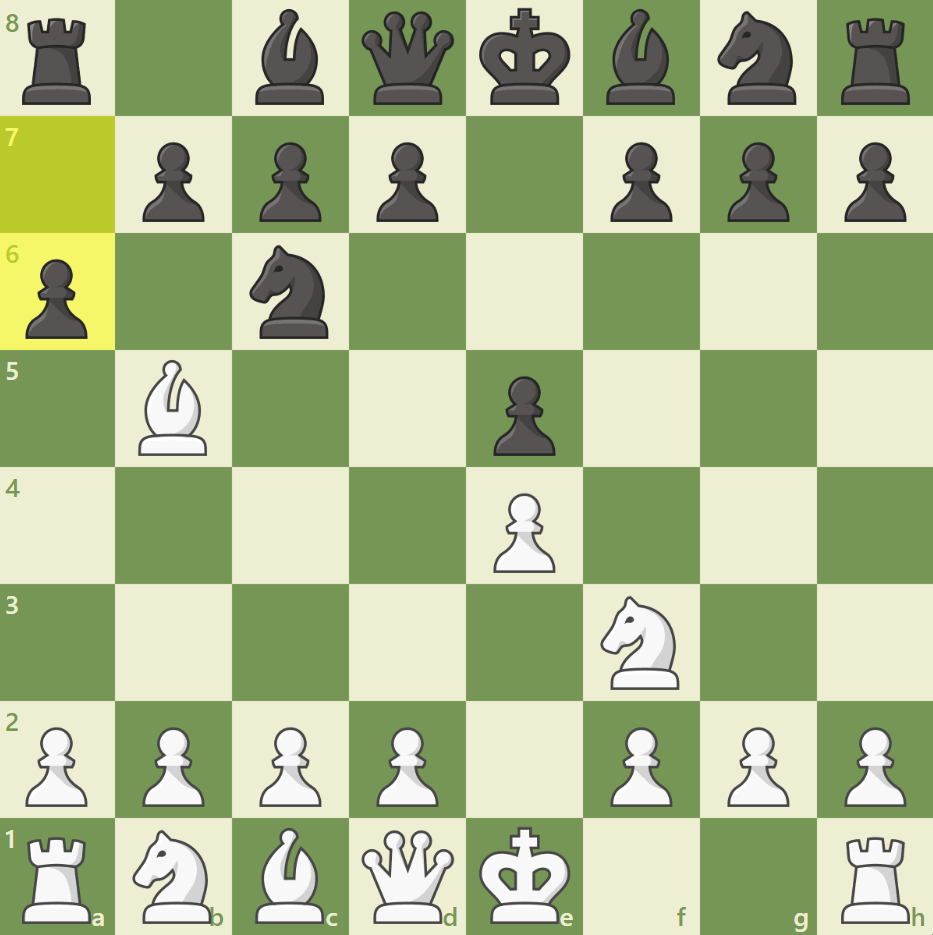
Called the Morphy’s defense after the famous grandmaster Paul Morphy, this move immediately attempts to relieve the pressure from the Bishop. The most common move for White here is 4. Ba4, as shown in the following diagram:
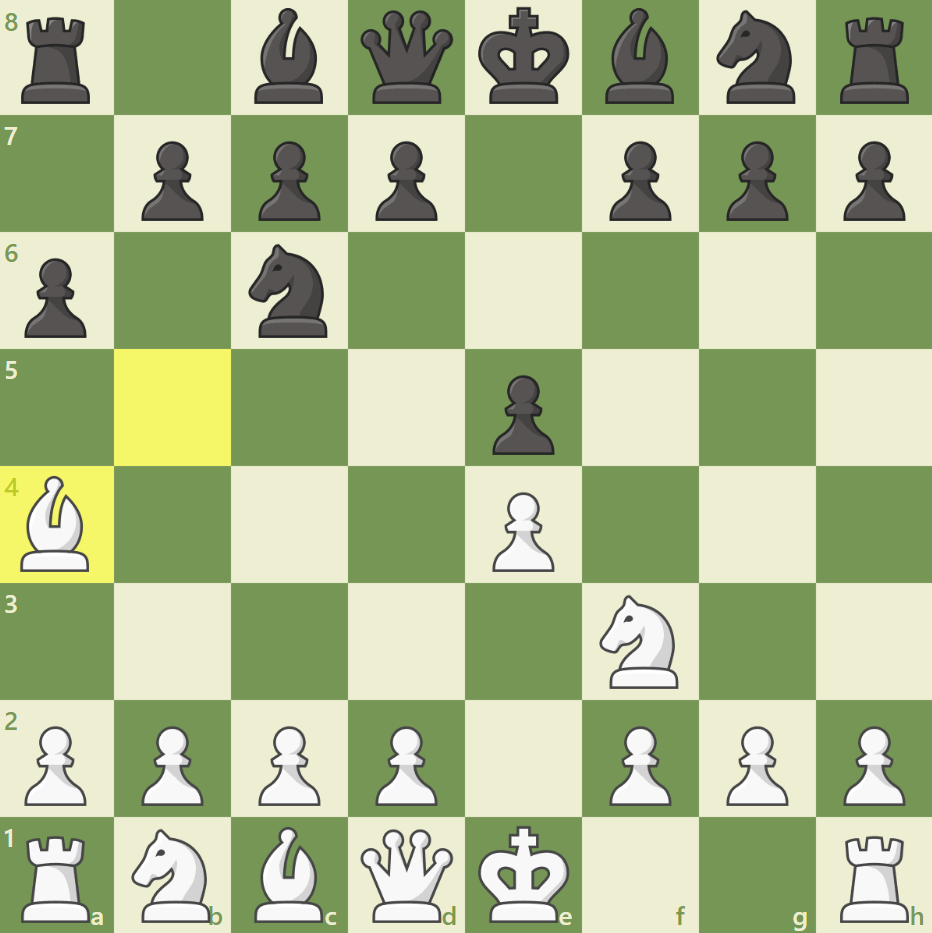
The idea behind this move is very simple: White still tries to maintain indirect pressure on the Knight. Now, Black usually plays 4… Nf6.
4… Nf6
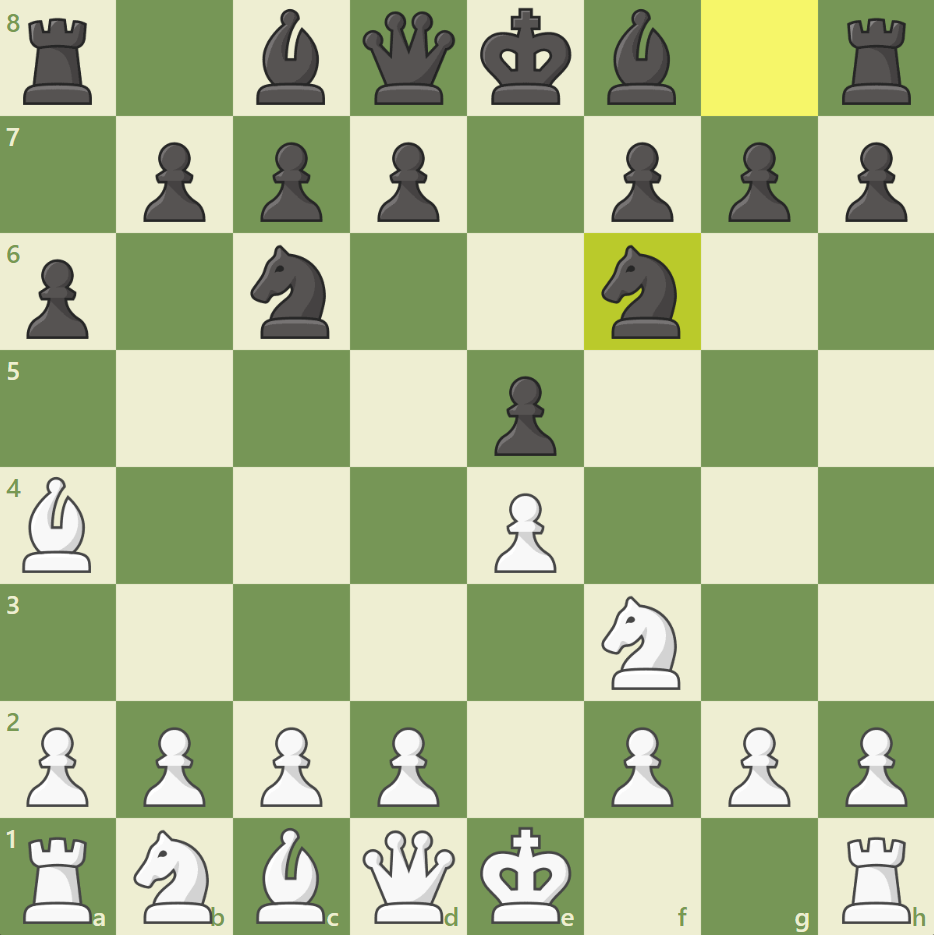
An “obvious” move from Black, developing the Knight, and attacking the undefended e4 pawn. While many players would feel inclined here to defend the e4 pawn as White, with moves such as 4. d3 and 4. Nc3, the best move is actually 5. 0-0.
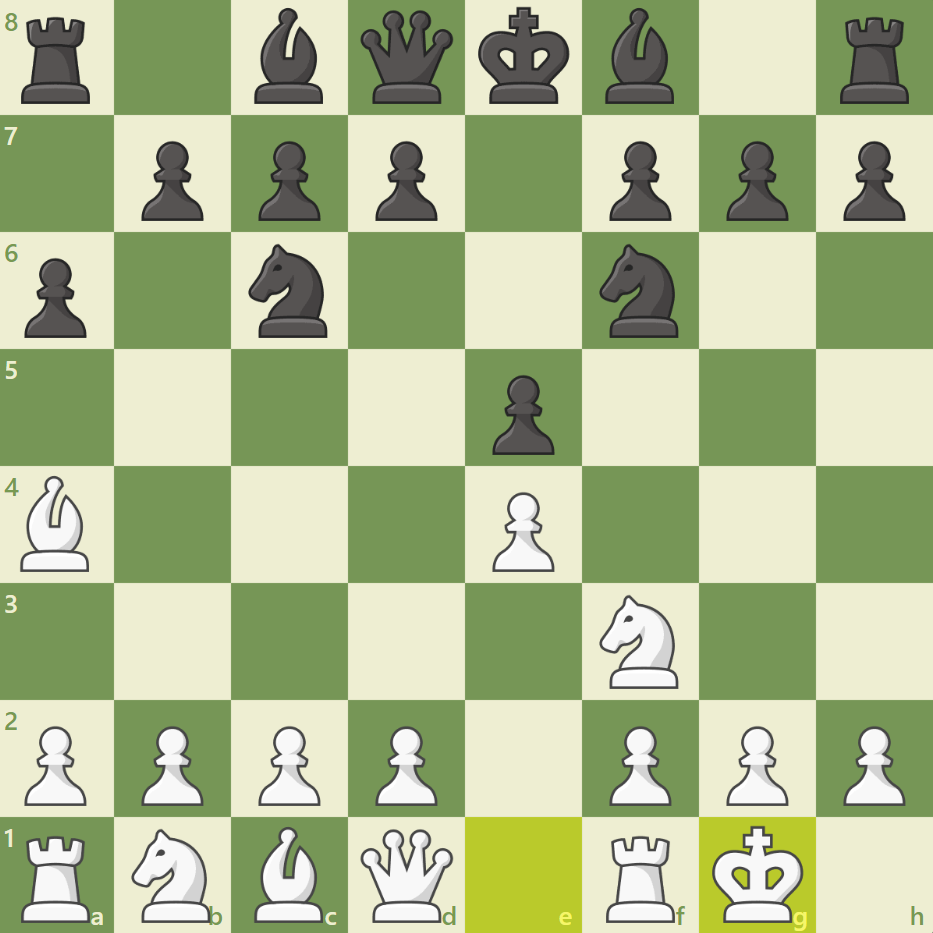
At first glance, this doesn’t seem like the best move – after all, hasn’t White given Black a free pawn?
5… Nxe4
Grabbing the material, but White has a powerful response:
6. d4!
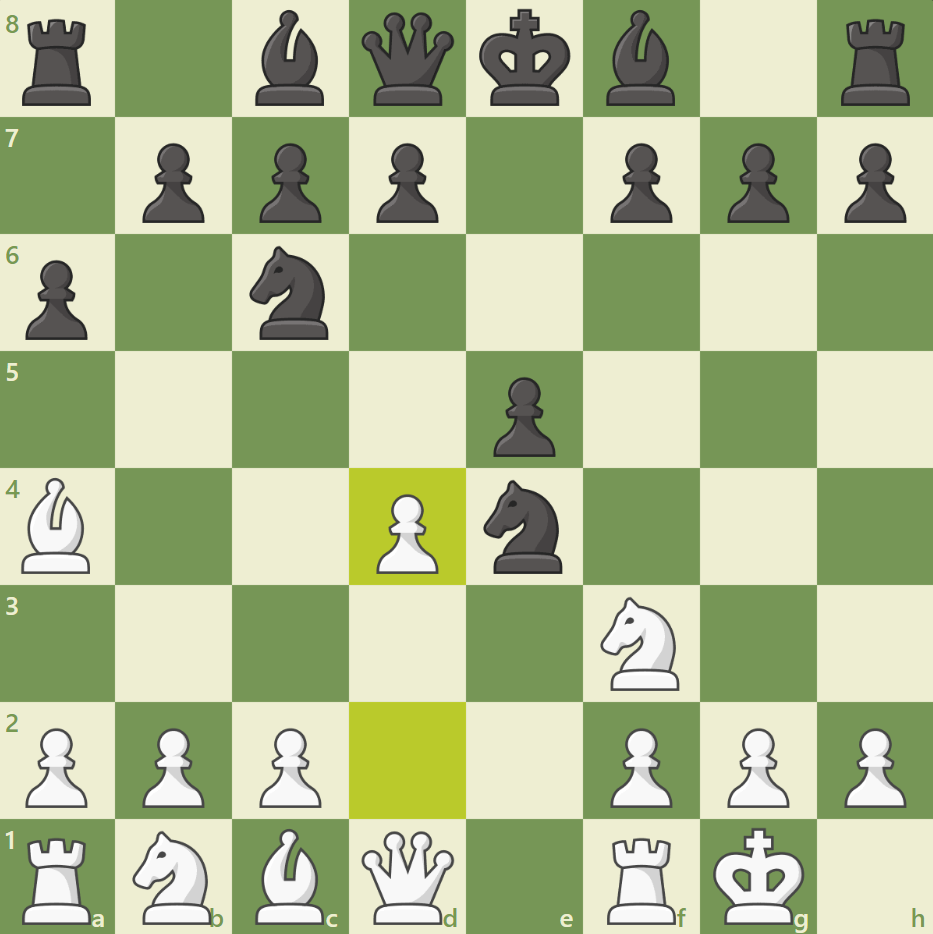
An extremely powerful move that aims to rip open the center and punish Black if he tries to grab more material. The point of this move is seen immediately if Black tries to take the pawn:
6… exd4 (Very greedy: If Black does not play this correctly he goes down very quickly.)
7. Re1!
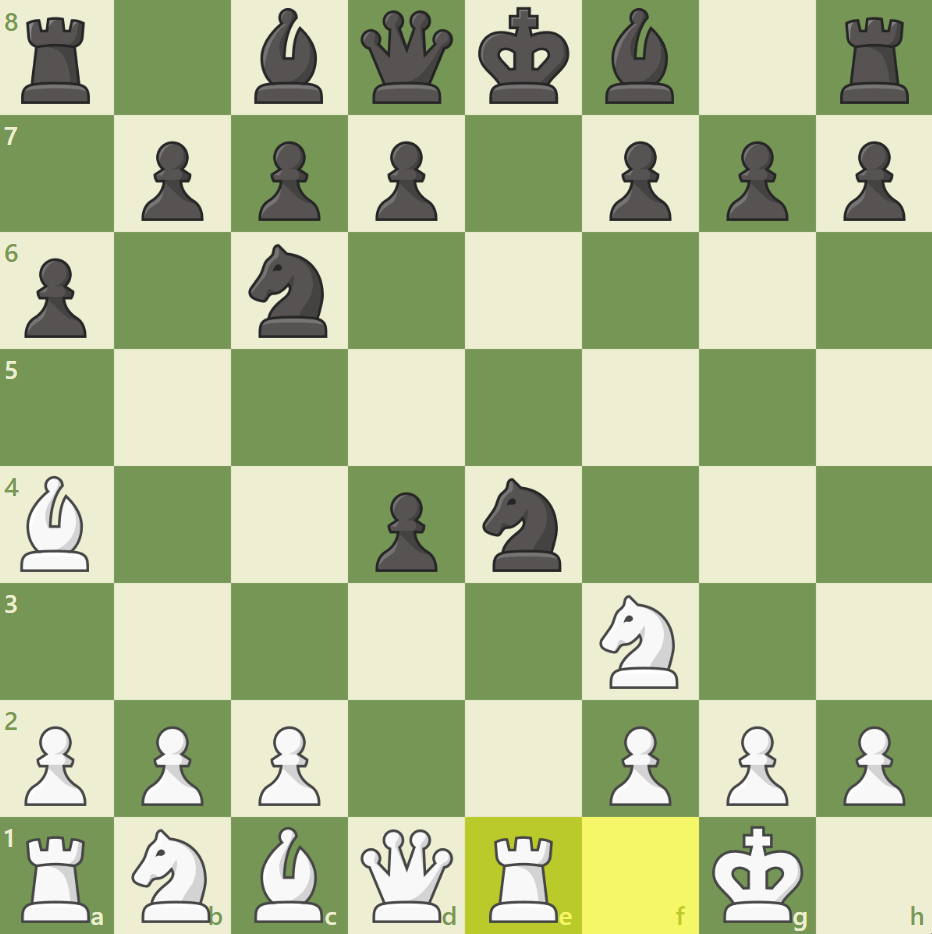
Pinning the e4 knight to the Black King: now, Black is forced to defend the Knight.
7... d5
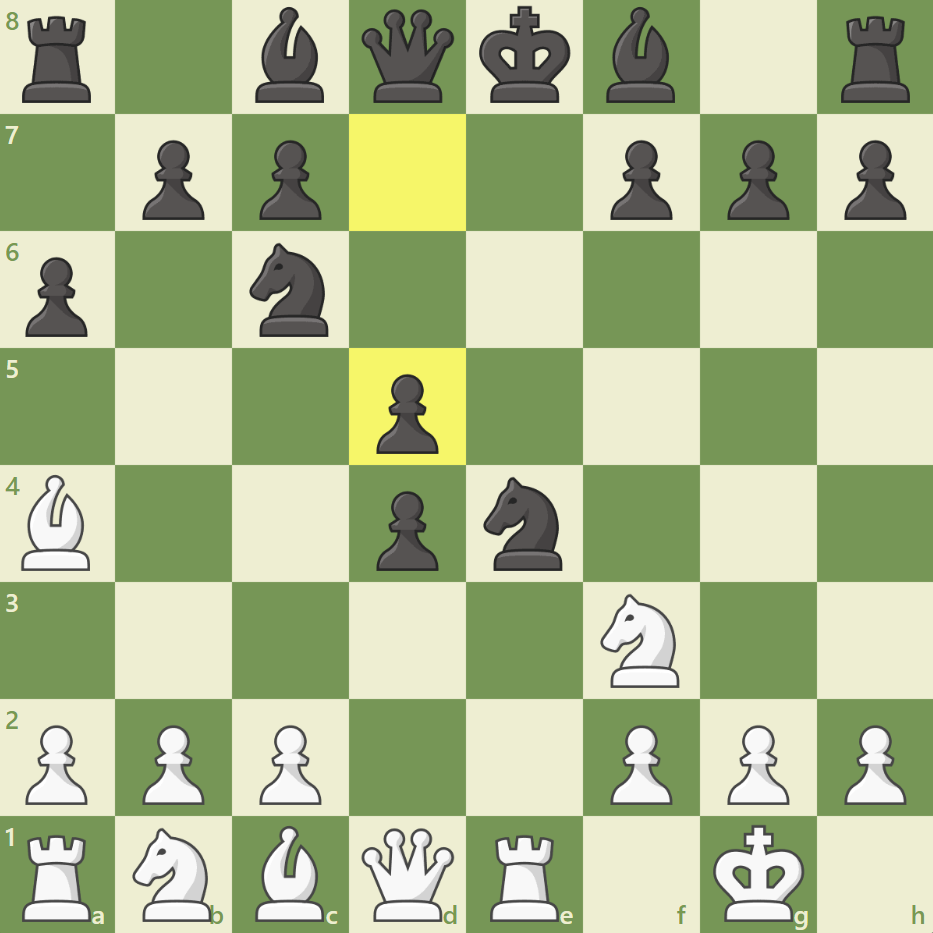
Probably the best move for Black. He can also play 7… f5, but after 8. Nxd4, Black’s position is very weak.
8. Nxd4
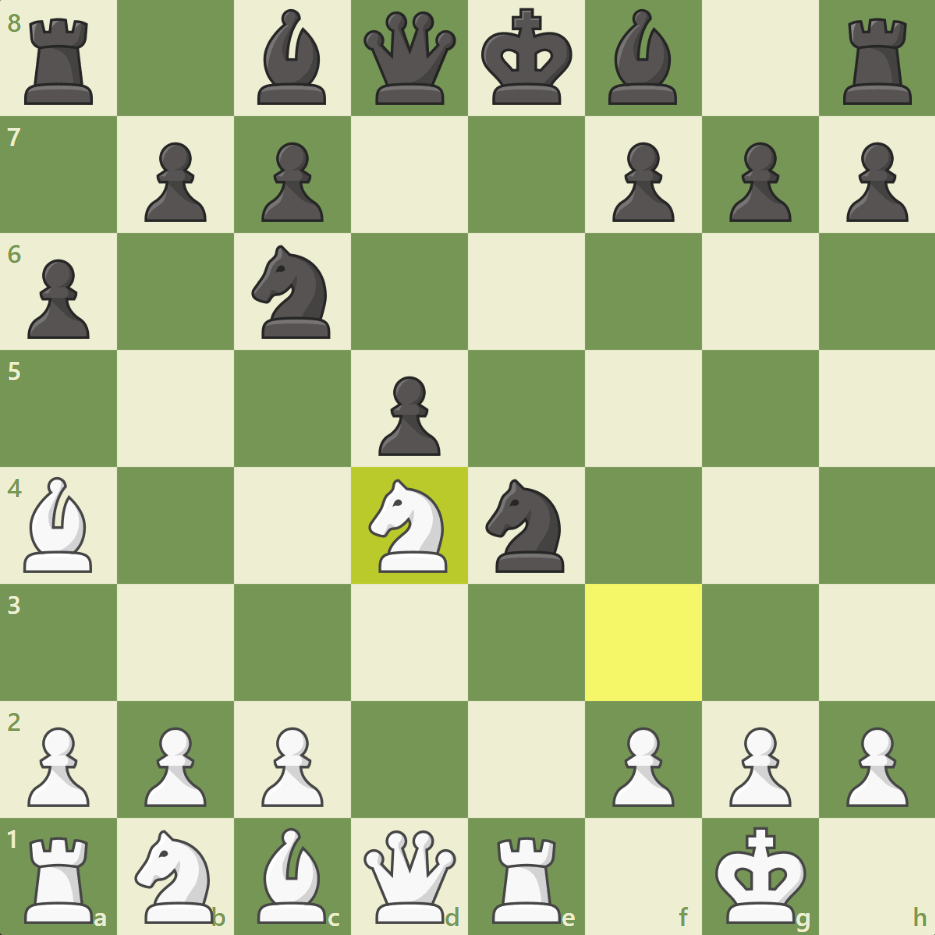
We’ll leave the analysis at here: not only has White regained the lost pawn, Black’s position is rather fragile, and will crumble quickly if he doesn’t play precisely. Feel free to analyze this position on your own time, and feel free to check your analysis with a computer, or any other resources you have!
Let’s examine a more solid line for Black: although taking the pawn on e4 initially is certainly an option, he needs to understand that he cannot hold onto the pawn, and has to give it up eventually. Let’s see a better line if Black decides to take 5… Nxe4.
5. Nxe4 6. d4! b5! 7. Bb3 d5 8. dxe5 Be6
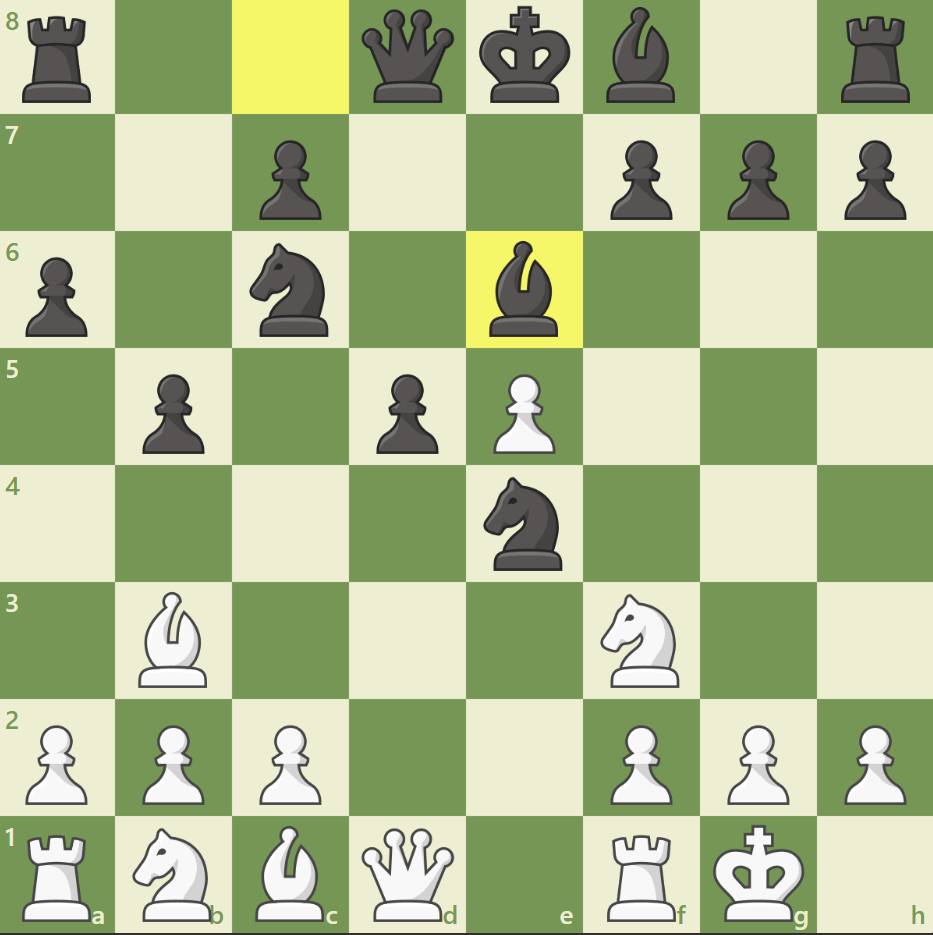
Considered to be the starting point of the Open Ruy Lopez, this position is very dynamic indeed. Black has a strong central position with the fortified d5 pawn, whereas White has the same with his e5 pawn.
I suggest you search up games played in this variation, to get a better understanding of how this position might play out.
If Black understands the risks of taking the pawn on e4, he can elect not to take it on move 5, and instead play:
5… Be7
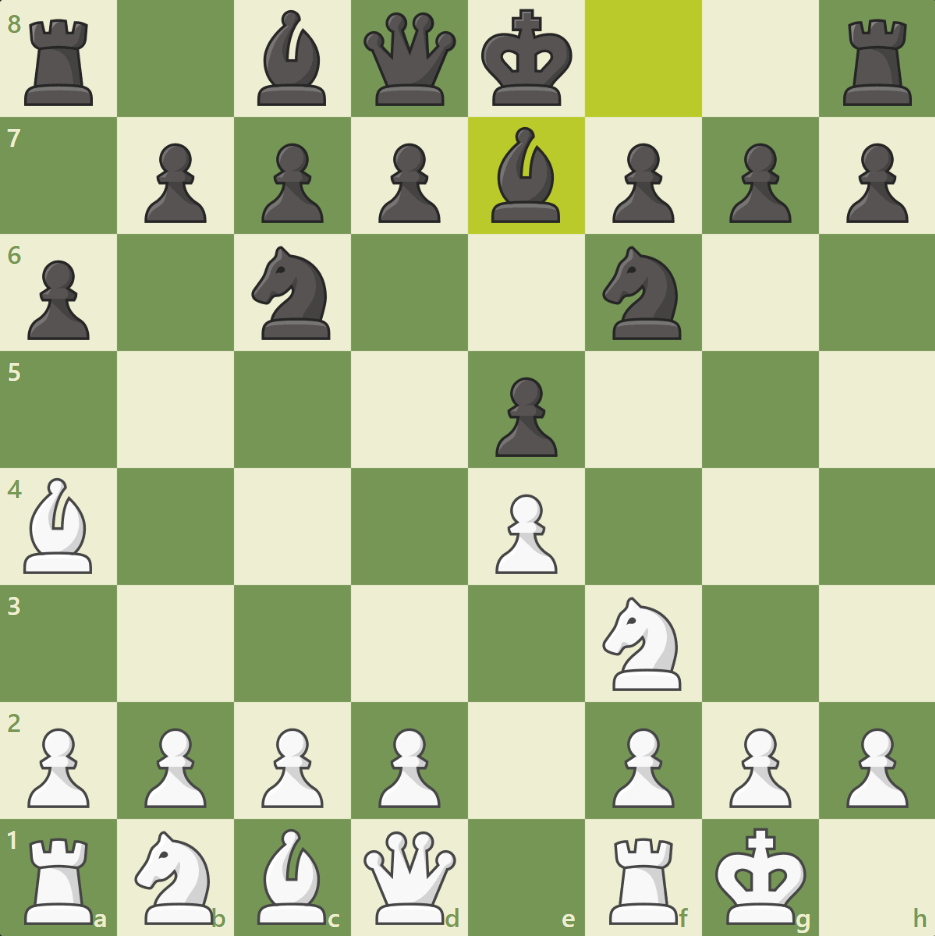
A simple developing move that initiates the Closed Variation of the Ruy Lopez. Now, Black threatens to take the e4 pawn if White decides not to do anything: for example 6. a3? (This is obviously not a good move, this is just an illustration of why White needs to defend his e4 pawn.) 6… b5! 7. Bb3 Nxe4 8. Re1
8… d5!
Now, the point of Be7 has been highlighted: by “blocking” the Black King from a Re1 pin we observed earlier, Black can freely play this move.
9. d3 Nf6 10. Nxe5 Nxe5 11. Rxe5 0-0, where Black has a very strong position: he can either take space on the queenside by playing c5-c4, or by playing Bd6 and attempting to go for a King-side attack.
Since White will probably choose to defend his pawn instead, the best move is:
6. Re1!
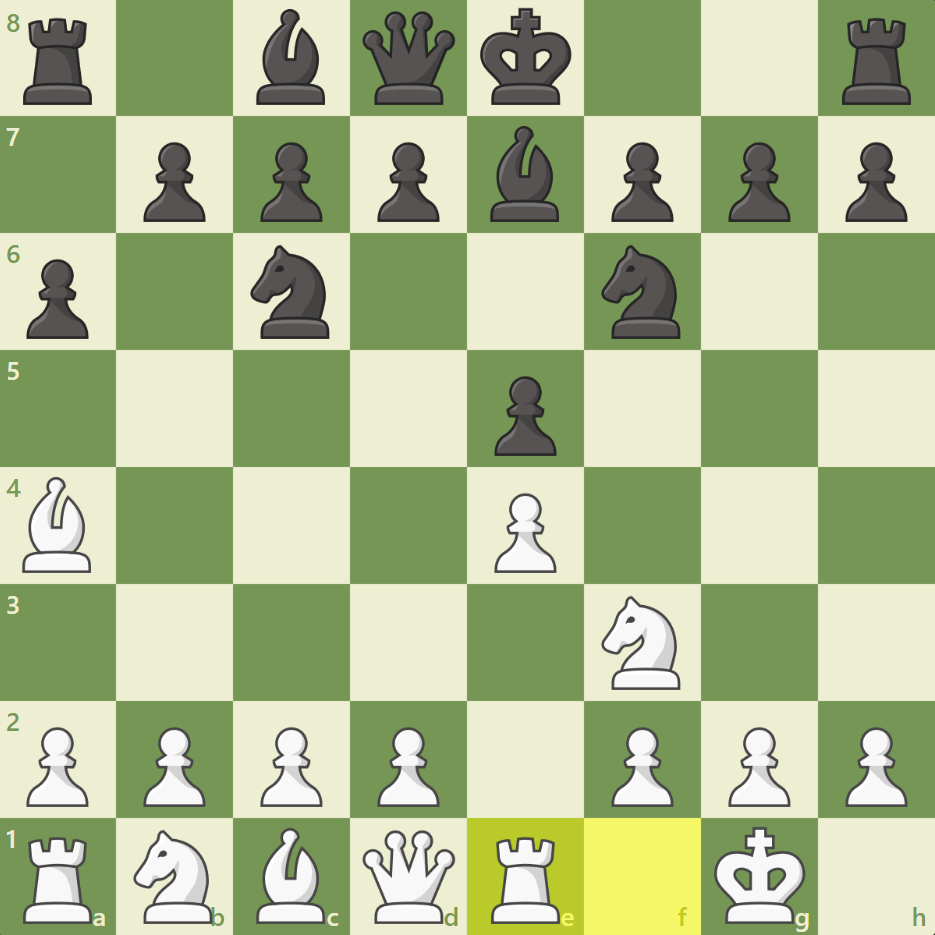
This move appears to be strange at first glance: isn’t it better for white to guard the pawn with 6. d3, or 6. Nc3 instead? Why move the rook twice?
First, we’ll address 6. d3: this is NOT a bad move at all. In fact, this has been very popular among the top grandmasters recently, and is a solid system. However, I would not recommend this move to beginners, as this is a rather undynamic variation.
Secondly, while 6. Nc3 is not by any means a bad move, it blocks the c2 pawn from moving to c3, which will support an eventual d4. The other point of an eventual c3 is that it gives the White Bishop the c2 square to move to if it is kicked from b5, Na5 etc. Given how important this central pawn formation is, it is better to keep the Knight flexible for now.
6… b5
A logical follow up to a6, pushing the White bishop back and preventing any Bxc6, Nxe5 shenanigans. Now the bishop is forced to move to b3:
7. Bb3 d6
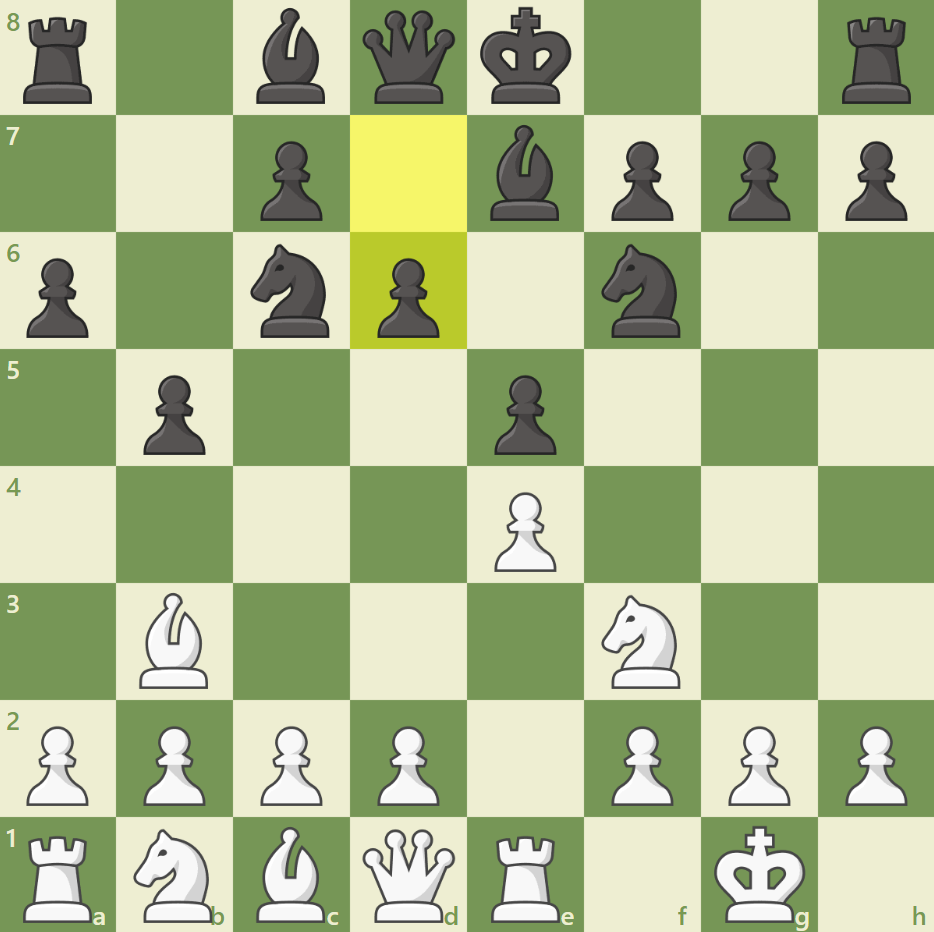
Both very logical moves: Black’s d6 not only guards the pawn, but also opens up the c8-h3 diagonal for his light-squared Bishop. White now has to be wary of the possibility of Bg4.
8. c3
Preparing to play d4, and firmly gain a foothold in the center. As previously mentioned, this also gives the White bishop a safe square to c2 if threatened.
8… 0-0
Black finally castles, and is now ready to make preparations to challenge White in the center.
9. h3!
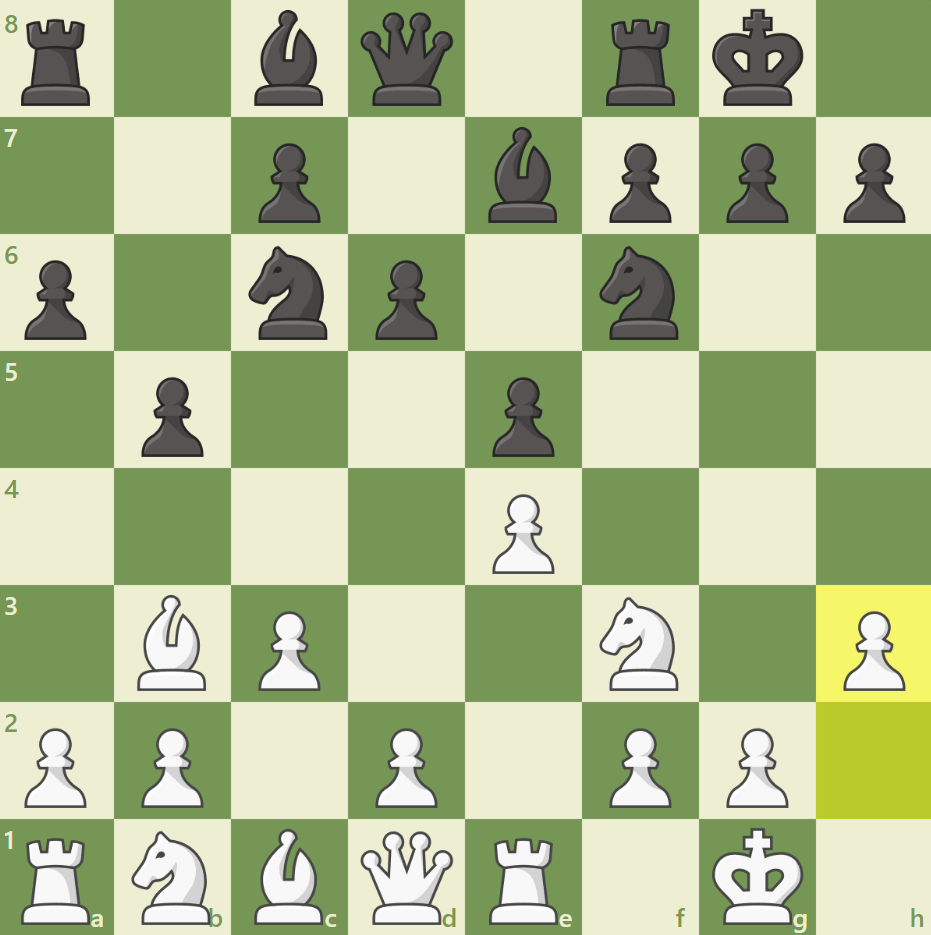
This might seem like an odd move at first, but this is a very useful move indeed for White. White wants to play d4 as soon as possible, but this runs into an annoying Bg4 pin, so White prevents it immediately. Now, Black has a couple of moves he can play, but we’ll just be examining the most common move:
9… Na5
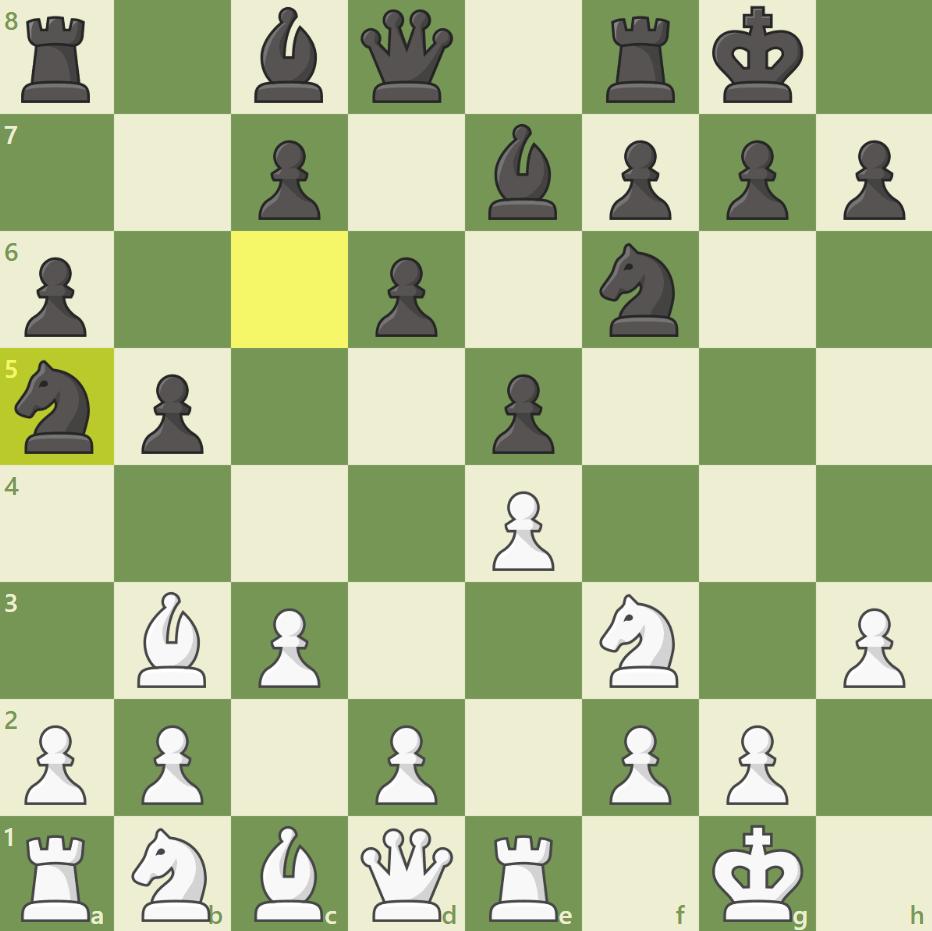
An excellent move from Black, not only threatening to take the dangerous Bishop on b3, but also threatening to play c5! and taking a foothold in the center. White should not let Black take the bishop: for example, if he continues with his plan of d4, he runs into 10. d4?! Nxb3 11. axb3 Bb7 (threatening to take the e4 pawn) 12. d5 c6! when Black is at least equal to White.
Taking all this into account, the position should play out like this:
10. Bc2 c5! 11. d4!
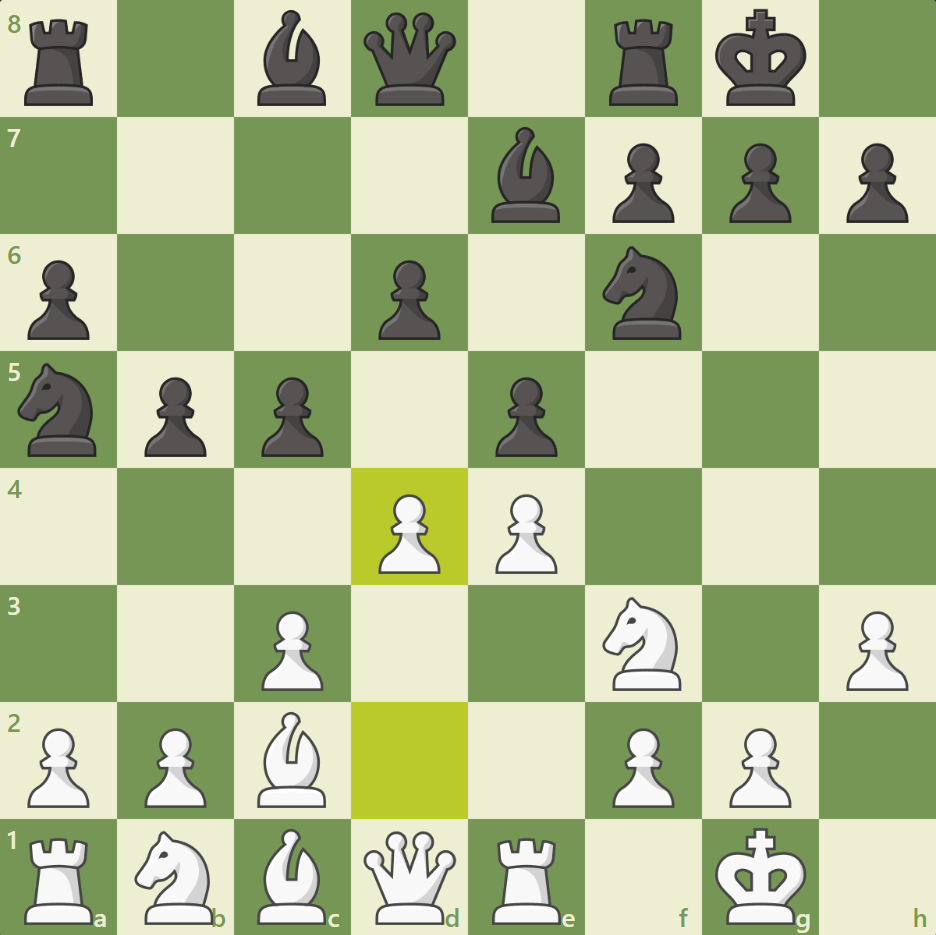
What an epic position! Truly one of the richest positions in Chess, you are sure to find this position in almost every textbook and opening book. Both sides are fighting for supremacy in the center: Black should play 11… Qc7 here, in order to defend the e5 pawn.
However, we will have to leave this section as it is: feel free to study this opening variation further, and review pro games by them. The next opening we will be reviewing for White is the Italian Game: another 1. e4 e5 based opening, and then lastly will be the Queen’s Gambit, the most common 1. d4 d5 opening.
